
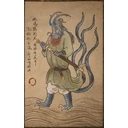
Relief of the Fallen Loong
Yellow Loong小黄龙
- What it inflicts
- Shock
- Phases
- 2 phasesa single health bar; electric aerial assault after a good chunk of his health
- Equipment
- One setno shrine or checkpoint between the phases
Recommended gear
With what you can have when you first come across it.
Editor's pick The Loongscale set massively shortens Shock with its 3 pieces: upgrade it before the fight. The Thunderstone and the Thunderbolt Horn add Shock Resistance. See No Evil makes Perfect Dodges easier, your best defense against his long combos, and the Wind Tamer cuts off his aerial assault.
- Weapon attack
- 80
- Armor defense
- 131
- Resistance: Shock
- +8
Base values, before upgrades, from the registry.
- Weapon
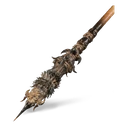 Chitin Staff Crafting: Venomous Hair × 1, Refined Iron Sand × 4, Yaoguai Core × 8, 20,000 Will
Otherwise: Kang-Jin Staff
- Headgear
Otherwise: Golden Mask of Fury
- Chest
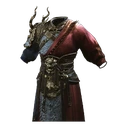 Loongscale Battlerobe Crafting: Silk × 5, Cold Iron Leaves × 2, 4,500 Will
Otherwise: Galeguard Beastmaw Armor
- Arms
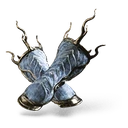 Loongscale Armguard Crafting: Silk × 1, Cold Iron Leaves × 1, 2,000 Will
- Legs
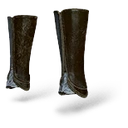 Loongscale Greaves Crafting: Silk × 2, Cold Iron Leaves × 1, 2,700 Will
- Vessel
- Spirit
Otherwise: Non-Able, Earth Wolf
- Transformation
Otherwise: Azure Dust
- Spells
- Curios
- Gourd
Otherwise: Medicine Sage Gourd
- Soaks
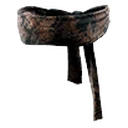
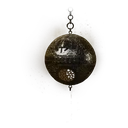
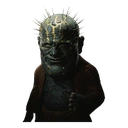

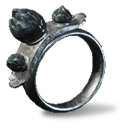
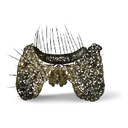
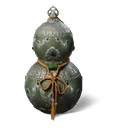
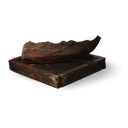
The fight
A single fight, with no pause, against a loong in human form wielding a polearm. First, fast lightning-charged combos, often ending in a small blast, and a fearsome grab. After a good chunk of his health, he releases an electric burst around him, then chains lightning dives and slams from the air; the lower his health, the longer his combos, and he then dodges your charged heavy attacks by turning intangible.
One set: no pause, and his Shock lasts the whole fight.
Spells, transformation and soaks are set at a Keeper's Shrine (soaks also with the Shen Monkey), never during a fight: what you bring into a fight stays until the end. One spell per category: Cloud Step and Rock Solid exclude each other, pick one before the fight.
What it inflicts
- Shock: his strikes are charged with lightning, and his grab almost always leaves you shocked, with huge damage. While shocked, you take more damage and your stamina recovers poorly: remove the state whenever you can without leaving yourself open.
Attacks to watch
- Opener, almost always the same: he charges up, then dashes in with a thrust, followed by a 2-hit spin and an electric slam. Dodge sideways, then land a light combo.
- 2 downward slashes, then a huge arc that creates an electric wave in front of him; later on, a second orange blast follows. Dodge toward him, not away.
- If he flips his weapon to strike with the other end without turning, it's an unblockable grab: Shock almost guaranteed and huge damage. Dodge, or break the move with the Non-Able spirit.
- Aerial assault: he stops, charges up and releases a burst around him, rushes in low to the ground, then chains 2 to 3 electric dives and lightning slams, each with a different wind-up. The safest option is to cut it off as he charges.
- In the second half of the fight, he dodges your charged heavy attacks, intangible, then counters: deflect his counter, and only throw heavy attacks after a deflection.
What works
- Wind Tamer: triggered as soon as he charges his aerial assault, it stuns him and stops him from launching it; you often only have enough Qi for 1 use. Otherwise, a charged Thrust Stance heavy attack, with 3 Focus Points, or Cloud Step on his first charge: the decoy takes the rest. Wind Tamer, Cloud Step
- Cast your spells from the start, he has a single health bar: Immobilize, the Wandering Wight's attack, A Pluck of Many and quick attacks. When the duplicates vanish, Umbral Abyss, which strikes as you transform and can stun and chill him at full Might; then alternate Cloud Step and Immobilize. Immobilize, Wandering Wight, A Pluck of Many, Umbral Abyss
- Shock-Quelling Powder: it removes Shock and briefly raises your Shock Resistance; the Webbed Hollow shrines sell it. Shock-Quelling Powder
- Rock Solid, in place of Cloud Step: right after his burst, deflect his first aerial pass, the only deflection that stops the whole assault. A deflection also fills your 4th Focus Point for a heavy Thrust or Pillar Stance riposte. Rock Solid
Strategy
- Non-Able spirit: cheap in Qi, it recharges in a few hits; cast right after a light attack, it staggers him and breaks his strings. Non-Able
- Build Focus with light combos, and save heavy attacks for after a deflection: he has no time to dodge them, and at 4 Focus Points he goes down every time.
- Perfect Dodges are your best defense against his 6-hit combo; against the blast that follows, sprint to the edge of the arena or soak it in a transformation.
- It's a war of attrition where 2 or 3 hits can kill you: avoid needless damage so your gourd doesn't run dry, and heal as soon as a hit lands.
Access
Webbed Hollow, hidden Relief of the Fallen Loong area. From the Cliff of Oblivion shrine, once Bodhisattva's Right Hand is beaten, cross its body and drop down; go left, cross the long rope bridge, then the narrow bridge surrounded by Clawed Cocoons: cast Cloud Step at the start and run to the end without waking them. Follow the cliffside path to the Relief of the Fallen Loong shrine; he waits in the pavilion just above. Requirements: the Loong Scales, found in Chapter 2 (Sandgate Village, in the Valley of Despair shrine's cave, behind the wall of small Buddha statues in the First Prince of the Flowing Sands' arena), which are never used up, and the 3 other loongs beaten: Red Loong (Chapter 1, waterfall at Outside the Forest), Black Loong (Chapter 2, sand waterfall at Rockrest Flat) and Cyan Loong (Chapter 3, Turtle Island). Optional and hidden.
What it gives
- to obtainGolden Lining
- to obtainSea-Supporting Tendon
- to obtainKun Steel
- to obtainMind Core
- to obtainLoong Pearl
- to obtainGolden Carp
Will: 5,049
Unlocks
- to obtainThe Sire and Sons
Golden Lining is earned by picking up his weapon after the fight: you transform into the Yellow Loong, immune to Shock, able to see through the enemy, and every attack inflicts Thunder Bane.
The Sea-Supporting Tendon is the last component of the Golden Loong Staff, an upgrade of the Loongwreathe Staff, along with the Cyan Loong's Mountain-Shaking Claw and 2 Kun Steel: a second Kun Steel drops, for example, from The Duskveil or the Hundred-Eyed Daoist Master.
He is the last of the 4 loongs: beating him unlocks the "The Sire and Sons" trophy.
Updates
Update 1.0.13: fixed the Yellow Loong sometimes getting stuck underground, and some of his skills that could not be interrupted even after being seen through.
In NG+
In NG+, you keep your gear, spells, transformations and spirits, and bosses are tougher. Key items don't carry over: the chapter's quest items must be taken again.
Page checked on October 16, 2026.