
Spirits
54 spirits with 6 levels, as in the game: obtaining one gives level 1 (1 objective, 100%), then 5 cultivation levels up to level 6 (Max mode). Knots of Voidness limit cultivation: 19 per cycle (10 in chests, 9 from bosses), about 6 cycles for all 54 spirits at level 6 (estimate, see Dataset).
Obtained0 / 54
54 items shown of 54
Ch. 1
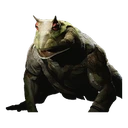
Baw-Li-Guhh-Lang: dropped by the Baw-Li-Guhh-Lang boss (Bamboo Grove > Snake Trail). Facing this fast travel point, jump over the cliffs on the left to reach the lower area with a river. Turn left and follow the river to its end to find the boss.
0/6
Ch. 5
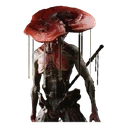
Nine-Capped Lingzhi Guai (Field of Fire > Ashen Pass III): in the area to the right of the shrine, pull out the biggest mushroom to start the secret Nine-Capped Lingzhi Guai boss fight, then collect its spirit.
0/6
Ch. 5
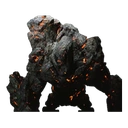
Flint Vanguard (Field of Fire > Fallen Furnace Crater): dropped by the Flint Vanguard boss. From Fallen Furnace Crater, turn around and go back down the path where the big ball rolled earlier. Halfway down, on the left, the ball has smashed a barrier: take the new path down on the left to reach the boss, which looks like a mass of magma rocks.
0/6
Ch. 5
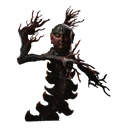
Mother of Flamlings (Field of Fire > Fallen Furnace Crater): dropped by the Mother of Flamlings boss, further down the path past the Flint Vanguard boss. From Fallen Furnace Crater, turn around and go back down the path where the big ball rolled earlier; halfway down, on the left, take the path the ball opened through a barrier to reach Flint Vanguard. Past him, keep going down to a glowing red patch of magma on the ground: bring 4 Flame Ore there to summon the Mother of Flamlings. If you die, you have to bring 4 Flame Ore again. Flame Ore drops from the enemies nearby, such as the fire-spitting worms.
0/6
Ch. 5
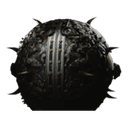
Steel ball stuck in the rock, on the path up from The Emerald Hall (Furnace Valley): interact with it. It appears after the iron-ball cutscene of Ashen Pass III according to some guides, only after defeating the Bishui Cave boss "Top Takes Bottom, Bottom Takes Top" according to others: if it is not there, come back after that fight.
0/6
Ch. 5
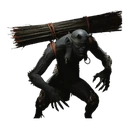
From the Valley Entrance shrine (Furnace Valley), keep going forward. The path soon climbs and passes under 2 large torii-like gates; past the 2nd one, Cloudy Mist and Misty Cloud appear in a wide area. Defeat them to obtain their spirit.
0/6
Ch. 5
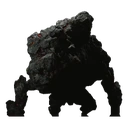
Flint Chief: dropped by the Flint Chief boss (Furnace Valley > Valley Entrance). From this shrine, go forward to a lava lake. Cross it on the left of the main path: he waits inside the lava at the far end.
0/6
Ch. 5
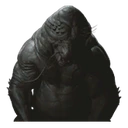
Father of Stones (Woods of Ember > Height of Ember): obtained from the Father of Stones story boss, met just past this shrine.
0/6
Ch. 4
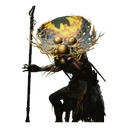
Fungiwoman (Temple of Yellow Flowers > Court of Illumination): from this shrine, turn around and climb the stairs straight across. Where the path splits, go right: the mushroom you can pull out of the ground is in fact the hidden Fungiwoman boss, which drops the spirit. A drink is also waiting to be picked up behind this boss.
0/6
Ch. 4
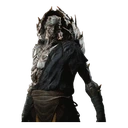
Commander Beetle (Temple of Yellow Flowers > Forest of Ferocity): dropped by the Commander Beetle boss. From the shrine, go forward and up the stairs: he stands on the right, where many enemies are training.
0/6
Ch. 4
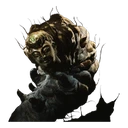
Elder Amourworm (Webbed Hollow > The Verdure Bridge): from the shrine, cross the wooden planks, then go left. Pass to the right of the 2 lanterns into a room with 4 chests and continue past them to the boss area. Defeating the boss gives the key item Proto-Amourworm. Next, complete Chen Loong's quest to reach Zodiac Village and give the Proto-Amourworm to Chen Loong (the dragon). Back at The Verdure Bridge, break cocoons until you have 3 Rice Cocoons (you may already have them from your first visit). Return to Zodiac Village and feed the Rice Cocoons to the worm next to the jars, in the area above the 2 monkeys: it takes only 1 per rest, so rest between each. After the 3rd Rice Cocoon, rest once more and collect the spirit where the worm was.
0/6
Ch. 4
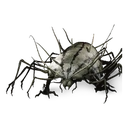
Centipede Guai: dropped by the Centipede Guai main boss (Webbed Hollow > Middle Hollow/Bonevault), which waits below the cliffs ahead of this shrine.
0/6
Ch. 3End of ch. 3Missable
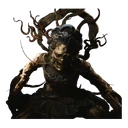
Apramana Bat: defeat the Apramana Bat boss; the spirit only reaches your inventory AFTER Chapter 3 ends. The boss is at Bitter Lake > North Shore of the Bitter Lake: from this shrine, go straight ahead and follow the shoreline on the right to its end, where a cutscene introduces it (a bat in golden armor). Important: this boss is missable and must be killed before Zhu Bajie (the little boar companion) leaves your party in Chapter 3. The spirit does not drop when the boss dies: check your inventory at the start of Chapter 4.
0/6
Ch. 3
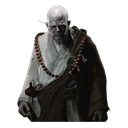
Non-Void: dropped by the Non-Void boss, at the end of the fox questline in Chapter 3. 1) At Valley of Ecstasy > Forest of Felicity, talk 3 times to the corpse in front of a gate to turn into a fox and receive the Snow Fox Brush. 2) Progress the story to New Thunderclap Temple. From New Thunderclap Temple > Temple Entrance, go straight through the next temple, climb the stairs, take the left path down, go straight into the next building and upstairs inside; from there, cross a wooden bridge up to a temple where the monk you are looking for waits. Only fox form triggers the cutscene and the Non-Void fight: use the Snow Fox Brush from your inventory to turn into the fox.
0/6

Ch. 3
Non-Pure (New Thunderclap Temple > Temple Entrance): from this shrine, keep going straight to an area with 2 big colossus enemies. Enter the building on their right to fight the Non-Pure boss. A meditation spot is also there once he is defeated.
0/6
Ch. 3
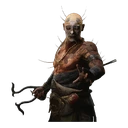
Non-White: dropped by the Non-White boss (Valley of Ecstasy > Mindfulness Cliff), a story boss you cannot miss, right after this shrine on the main path. You fight him twice: after his first defeat he flees and reappears further up the same path, about 1 minute on foot.
0/6

Ch. 3
Non-Able: dropped by the Non-Able boss (Valley of Ecstasy > Brook of Bliss). Climb the slope to the right of this shrine; at the top, go around on the right to find the boss.
0/6
Ch. 3
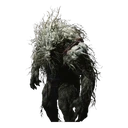
Old Ginseng Guai (Valley of Ecstasy > Towers of Karma): dropped by the Old Ginseng Guai boss. From the shrine, turn left and follow the path past the enemy facing the wall until a stone pillar appears in the corner. In front of the pillar, pick the big ginseng plant on the ground to start the fight.
0/6
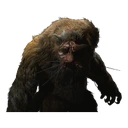
Ch. 2
Mad Tiger: dropped by the Mad Tiger boss. First defeat the Tiger's Acolyte chief at Yellow Wind Formation > Windrest Hamlet to get the Old Rattle-Drum, then use it at 3 places to open the way into the well. 1) Yellow Wind Formation > Windseal Gate: take the path left of the shrine, cross a bridge and turn left into a side area; when the screen turns gray, interact with the surroundings to use the Old Rattle-Drum. 2) Yellow Wind Formation > Windrest Hamlet: from this shrine, turn around, go down the stairs and through the gate, then search the side of the village where a few Withered Corpse enemies sit to use the drum again. 3) Sandgate Village > Village Entrance: in the village where you fought the Earth Wolf chief, search its corner to use the drum once more and watch a cutscene; then jump into the well to start the secret Mad Tiger fight.
0/6
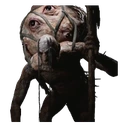
Ch. 2
Gore-Eye Daoist (Yellow Wind Formation > Windseal Gate): the Gore-Eye Daoist boss stands in front of a tree, along the path to the left of this shrine.
0/6
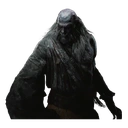
Ch. 2
Tiger's Acolyte (Yellow Wind Formation > Windrest Hamlet): from the Tiger's Acolyte boss, on the next bridge right after this shrine.
0/6
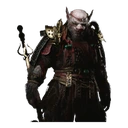
Ch. 2Missable
Second Rat Prince (Sandgate Village > Village Entrance): to the left of this shrine, cross the wooden bridge, then turn right to find the village entrance in the corner. Cross the courtyard and turn right to a locked wooden gate: open it to start the fight. Important: to get the spirit, defeat the small rat boss, the King of Flowing Sands, before killing the larger Second Rat Prince.
0/6
Ch. 2
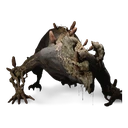
Earth Wolf (Sandgate Village > Village Entrance): to the left of this shrine, cross the wooden bridge, then turn right to find the village entrance in the corner. In the courtyard, look on the left for a breakable wall under a roof where a Rat Archer stands (or follow the path on the left at the end of the village): it leads to this miniboss's area.
0/6
Ch. 1
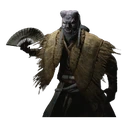
Guangmou: dropped by the Guangmou boss (Bamboo Grove > Snake Trail). Facing this fast travel point, jump over the cliffs on the left to reach the lower area with a river. Turn right, pass a snake enemy and enter a large bamboo area; follow the paved path to its end, past 2 torches, to reach the boss.
0/6

Ch. 1Missable
Wandering Wight: dropped by the Wandering Wight boss (Forest of Wolves > Outside the Forest). From the shrine, take the path straight ahead: the boss, with its big stone head, wanders along it. If you defeated him before your gourd was blessed (the blessing unlocks spirits), his spirit can be collected later at any shrine. Important: he disappears as soon as you ring the 3rd bell of Black Wind Mountain, which teleports you straight to the Chapter 1 secret boss, Elder Jinchi. He comes back in New Game+ and drops his spirit again if you missed it; he is reachable within 10 minutes of starting New Game+, and all spirits carry over.
0/6
Ch. 5
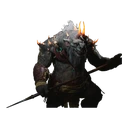
Bull Governor (Secret: Bishui Cave > Cave Depths): after the 2nd shrine of the secret area, this enemy, a big bull, stands right in front of you at the end of the next corridor.
0/6
Ch. 5
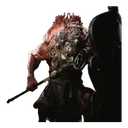
Earth Rakshasa (Furnace Valley > Valley Entrance): past the lava lake, you climb a rocky path. Before it bends right, take the optional path on the left, where one of the shield enemies guards a chest: absorb its spirit. This is just before the last stretch of path to the Cloudy Mist, Misty Cloud boss.
0/6
Ch. 5
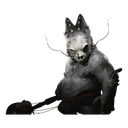
Turtle Treasure (Furnace Valley > Valley Entrance): from this shrine, go down the path to a lava lake on the right and cross it to find a big blue-glowing cat enemy guarding a golden chest; defeat it. Equip the Fireproof Mantle vessel (from the Chapter 1 secret area boss) to walk on lava without damage, or simply keep healing.
0/6
Ch. 5
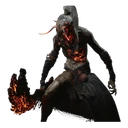
Charface (Woods of Ember > Height of Ember): after defeating the Father of Stones boss, open the gate and enter the next cave: this blue-glowing enemy, a big fiery figure with a sword, stands in the middle of the cave.
0/6
Ch. 4
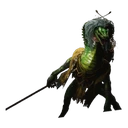
Snake Herbalist (Purple Cloud Mountain > Valley of Blooms): from the shrine, cross the bridge and go left. Keep climbing the path and you will meet him on the way.
0/6
Ch. 4
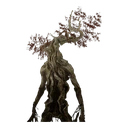
Verdant Glow (named Lushleaf in the Journal but Verdant Glow in the inventory): Purple Cloud Mountain > Valley of Blooms, which opens after defeating the Venom Daoist a 2nd time. Facing the shrine, drop down on its left where there is water; past the water, defeat the big blue-glowing tree enemy for the spirit.
0/6
Ch. 4
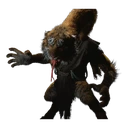
Snake Sheriff (Temple of Yellow Flowers > Temple Entrance): from this shrine, go straight into the temple, then slightly right through the gate. This blue-glowing enemy, a tiger with a long neck, is in that area.
0/6
Ch. 4
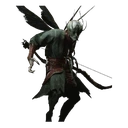
Dragonfly Guai (Webbed Hollow > The Purifying Spring): follow the path until stairs lead up to a new area; on the right side, defeat the blue-glowing flying enemy.
0/6
Ch. 4
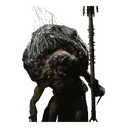
Puppet Tick (Webbed Hollow > Relief of the Fallen Loong): go left from the shrine and climb the rocks; inside the cave, hug the right side and the blue-glowing enemy comes into view in the distance.
0/6
Ch. 4
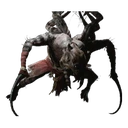
Puppet Spider (Webbed Hollow > The Verdure Bridge): from the shrine, cross the green planks and continue straight into an area with small spiders and a brazier. Drop down where an archer stands and continue right past an enemy with 2 blades. As soon as you reach the brighter area, check the left side for cocoons: the spirit is behind them.
0/6
Ch. 4
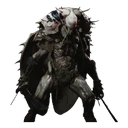
Beetle Captain (Webbed Hollow > Upper Hollow): facing this shrine, turn slightly left, then right again at once and follow the right path, the main story path to the next shrine. Count the archers shooting green arrows at you along the way: after the 2nd one, enter the cave on the right to find this blue-glowing beetle. Do not drop down on the left side.
0/6
Ch. 4
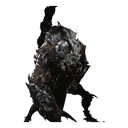
Scorpion Prince (Webbed Hollow > The Verdure Bridge): from The Verdure Bridge, take the left path over the green bridge covered in roots and turn left; where 2 lanterns stand, drop down on the right and go forward until stairs lead up to a village. Right at the village entrance, a blue-glowing scorpion enemy in front of a Luojia Fragrant Vine drops the spirit. It also drops the Deathstinger soak.
0/6
Ch. 4
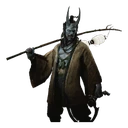
Lantern Holder (Village of Lanxi > Estate of the Zhu): after defeating The Second Sister boss, drop into the dark hole in the next area. Then fast travel back to Estate of the Zhu: a blue-glowing lantern holder now stands where The Second Sister was; defeat it.
0/6
Ch. 3
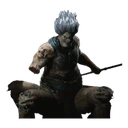
Clay Vajra (New Thunderclap Temple > Temple Entrance): from this shrine, keep going straight; after climbing the stairs behind the next building, you run into this enemy, a 4-legged monster that shoots fire from its belly.
0/6
Ch. 3
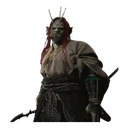
Red-Haired Yaksha (Bitter Lake > Precept Corridor): on the linear path right after this shrine, impossible to miss; he wears a white robe.
0/6
Ch. 3
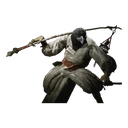
Crow Diviner (Valley of Ecstasy > Forest of Felicity): from this shrine, go forward and down the slope slightly to the right (do not go up through the gate on the left). Go all the way down to a small pond where an enemy with a bird face stands; defeat him for his spirit.
0/6
Ch. 3
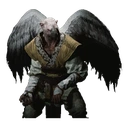
Falcon Hermit (Pagoda Realm > Snow-Veiled Trail): from this shrine, go straight up the slope, then take the left path. Climb this slope to the very top, 1 to 2 minutes on foot, where a blue-glowing flying bird enemy waits; defeat it for its spirit.
0/6
Ch. 3
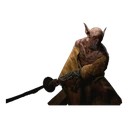
Blade Monk (Pagoda Realm > Outside the Wheel): standing in front of the shrine, turn around and walk towards the big bell-shaped structure where you fought the Captain Wise-Voice boss, then turn right and go to the end of the cliffs, where a wooden chest sits. There, drop down one level on the left and walk to the end of that level without dropping any further: this blue-glowing enemy stands in front of a golden-glowing keg that holds an Awaken Wine Worm.
0/6
Ch. 3
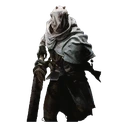
Enslaved Yaksha (Pagoda Realm > Upper Pagoda): you must first kill the Captain Lotus-Vision boss. From the Upper Pagoda shrine, turn around and drop into the pit. Then, from the Upper Pagoda shrine, go back along the hallway and down the hill. At the bottom, turn around and keep going straight until you can return to the outer edge and see a beam to walk on. On the other side, open a gate with a blue-glowing enemy inside.
0/6
Ch. 3
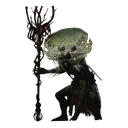
Fungiman (Pagoda Realm > Upper Pagoda): from this shrine, cross the next wooden beam where an archer stands, go through the 1st gate on the left and turn left to see a mushroom in the ground. Interact with it: it is a buried enemy. Defeat it.
0/6
Ch. 3
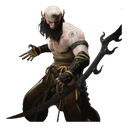
Mountain Patroller (Snowhill Path > Frost-Clad Path): follow the linear path past the Macaque Chief boss; when you reach an area with buildings, climb the stairs on the left and go straight to the end of the path. A group of enemies waits there, including the Mountain Patroller, a shirtless man who throws his weapon at you. Defeat him for the spirit.
0/6
Ch. 2
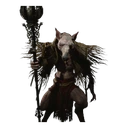
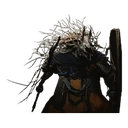
Rat Governor (Fright Cliff > Rock Clash Platform): right after this shrine, on the main path; he looks like a blue-glowing shaman.
0/6
Ch. 2
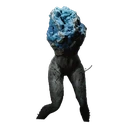
Spearbone (Fright Cliff > Rockrest Flat): from the shrine, take the path up on the right; this blue-glowing Spearbone, which looks like a samurai with a shield, gives its spirit when defeated.
0/6
Ch. 2
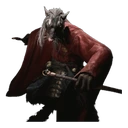
Poisestone (Fright Cliff > Squall Hideout): from this shrine, follow the left path until a way up to a cave opens. Go right, then take the next left uphill: a blue-glowing Poisestone stands on that path, just before the Rockrest Flat shrine. Defeat it for its spirit.
0/6
Ch. 2
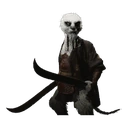
Rat Imperial Guard (Yellow Wind Formation > Windrest Bridge): from this shrine, go straight over the bridge and through the village. At the end of the village stand 3 rat enemies in red robes; the blue-glowing one drops the spirit. Use your spells to take them out one by one.
0/6
Ch. 2
Civet Sergeant (Crouching Tiger Temple > Temple Entrance): after defeating the Tiger Vanguard boss, interact with the statue in the arena (this needs the Sternness of Stone key item, dropped by the Stone Vanguard boss). In the cutscene, the blood drains from the arena and a hatch opens in the floor: drop through it and follow the path to this blue-glowing enemy, then defeat it.
0/6
Ch. 2
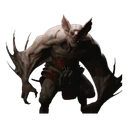
Swift Bat (Sandgate Village > Valley of Despair): from this shrine, take the path on the right into a cave. After 2 enemies, in the next part of the cave, drop down and head for the left corner. Walk across a broken pillar (an enemy shoots at you from the far side), then squeeze through a gap in the wall to reach a blue-glowing enemy; defeat it to collect its spirit.
0/6
Ch. 2
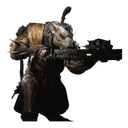
Rat Archer (Sandgate Village > Village Entrance): to the left of this shrine, cross the wooden bridge, then turn right to find the village entrance in the corner. In the courtyard, look on the left for a breakable wall under a roof where a Rat Archer stands (or follow the path on the left at the end of the village): it leads to the Earth Wolf miniboss. Once he is defeated, open the wooden village gate from behind: the archers standing on top fall down, and the blue-glowing one drops the spirit.
0/6
Ch. 1
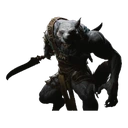
Wolf Assassin (Black Wind Cave > Outside the Cave): from this shrine, go forward until you cross a wooden bridge where archers shoot burning arrows at you. On the left, drop down into a side area with a chest, where a lone Wolf Assassin waits. Defeat him and he drops his blue soul.
0/6