
Journal portraits
203 portraits, unlocked by defeating each enemy at least once (just meeting them isn't enough). Entries without a portrait are counted through the bosses.
Portraits0 / 203
210 items shown of 210
Lesser Yaoguai Lesser Yaoguai 0/90
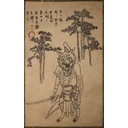
Ch. 1
Chapter 1 > Forest of Wolves > Front Hills: met automatically during the story, after the 1st boss.
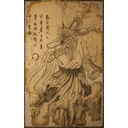
Ch. 1
Chapter 1 > Forest of Wolves > Front Hills: met automatically during the story, after the 1st boss.
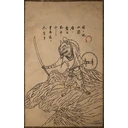
Ch. 1
Chapter 1 > Forest of Wolves > Front Hills: in the forest, after the 1st boss.
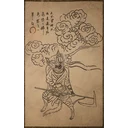
Ch. 1
Chapter 1 > Forest of Wolves > Front Hills: in the forest, after the 1st boss.
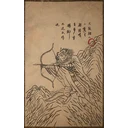
Ch. 1
Chapter 1 > Forest of Wolves > Outside the Forest: in the forest after the 1st boss, past the Bullguard miniboss (once you have learned your first spell).
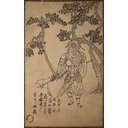
Ch. 1
Chapter 1 > Forest of Wolves > Outside the Forest: in the forest after the 1st boss, past the Bullguard miniboss (once you have learned your first spell).
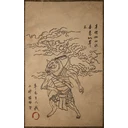
Ch. 1
Chapter 1 > Bamboo Grove > Marsh of White Mist: from this shrine, go down the wooden ramps; past the Whiteclad Noble boss, enter the cave: it is the first enemy inside.
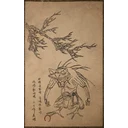
Ch. 1
Chapter 1 > Forest of Wolves > Front Hills: in the forest, after the 1st boss.
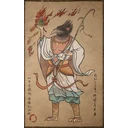
Ch. 1
Chapter 1 > Forest of Wolves > Front Hills: in the forest, after the 1st boss.
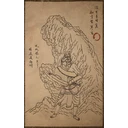
Ch. 1
Chapter 1 > Forest of Wolves > Outside the Forest: in the forest after the 1st boss, past the Bullguard miniboss (once you have learned your first spell). From the Outside the Forest fast travel point, take the left path to find this enemy.
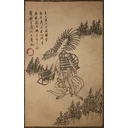
Ch. 1
Chapter 1 > Bamboo Grove > Snake Trail: in the areas beyond this fast travel point.
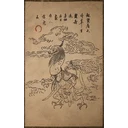
Ch. 1
Chapter 1 > Bamboo Grove > Snake Trail: in the areas beyond this fast travel point.
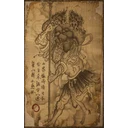
Ch. 1
Chapter 1 > Bamboo Grove > Snake Trail: facing this fast travel point, jump over the cliffs on the left to reach the lower area with a river. Turn right and pass a snake enemy to enter a large bamboo forest with a few snake and skeleton enemies. On the left path, pull the glowing yellow mushroom out of the ground: it is a buried Fungiling that rises to fight. Several mushrooms grow around, but only one is the enemy.
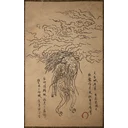
Ch. 1
Chapter 1 > Forest of Wolves > Outside the Forest: in the forest after the 1st boss, past the Bullguard miniboss (once you have learned your first spell). From the Outside the Forest fast travel point, take the left path and pull out the red weed growing there: it is a buried Ginsengling that rises from the ground.
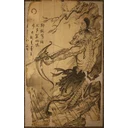
Ch. 2
Chapter 2 > Sandgate Village > Village Entrance: common throughout the start of Chapter 2.
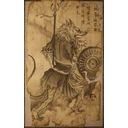
Ch. 2
Chapter 2 > Sandgate Village > Village Entrance: common throughout the start of Chapter 2.
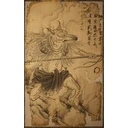
Ch. 2
Chapter 2 > Sandgate Village > Village Entrance: from the start of Chapter 2, go straight ahead through the flooded area; this lightning caster waits at the far end, where several frogs sit in the water, before the Village Entrance shrine. Another one stands where the first Rat Captain is.
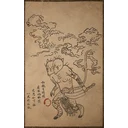
Ch. 2
Chapter 2 > Sandgate Village > Village Entrance: from this shrine, cross the wooden bridge on the right, then keep right into the village courtyard, where several archers, a Rat Governor and the Rat Captain wait.
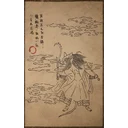
Ch. 2
Chapter 2 > Yellow Wind Formation > Windrest Bridge: from this shrine, take the path ahead across the bridge; this enemy, a rat in a red robe, is just past it.
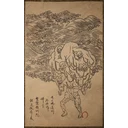
Ch. 2
Chapter 2 > Sandgate Village > Valley of Despair: turn around from this shrine and cross the wooden bridge; the big walking stone straight ahead is this enemy.
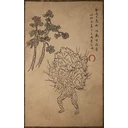
Ch. 2
Chapter 2 > Fright Cliff > Squall Hideout: from this shrine, take the left path; it is the first enemy you meet, a walking rock similar to the Pitstone.
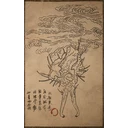
Ch. 2
Chapter 2 > Fright Cliff > Squall Hideout: from this shrine, take the left path and climb up to a cave. This enemy, a small blue walking rock, waits at the end of the path in front of a Buddha head. Once defeated it comes back to life, so defeat it a 2nd time.
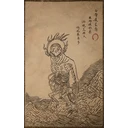
Ch. 2
Chapter 2 > Sandgate Village > Valley of Despair: from this shrine, turn around and cross the wooden bridge. Go straight ahead through the stone gate into a valley: the enemy on the right-hand wall is a Blazebone.
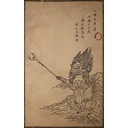
Ch. 2
Chapter 2 > Sandgate Village > Valley of Despair: from this shrine, turn around and cross the wooden bridge. Straight ahead, this samurai-like enemy stands under a stone gate.
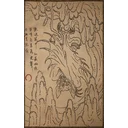
Ch. 2
Chapter 2 > Sandgate Village > Valley of Despair: from this shrine, take the path on the right into a cave. After 2 enemies, in the next part of the cave, drop down and head for the left corner. Walk across a broken pillar (an enemy shoots at you from the far side), then squeeze through a gap in the wall to reach a Swift Bat.
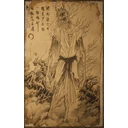
Ch. 2
Chapter 2 > Yellow Wind Formation > Windrest Bridge: these enemies stand around this shrine once the Tiger Vanguard boss is beaten.
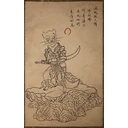
Ch. 2
Chapter 2 > Yellow Wind Formation > Windseal Gate: on the path immediately to the left of this shrine.
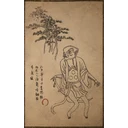
Ch. 2
Chapter 2 > Crouching Tiger Temple > Temple Entrance: after defeating the Tiger Vanguard boss, interact with the statue in its arena. In the cutscene, the blood drains from the arena and a hatch opens in the floor: drop through it and follow the path to a group of small rats with daggers.
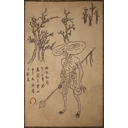
Ch. 2
Chapter 2 > Sandgate Village > Village Entrance: from this shrine, turn around, climb the stairs and follow the path ahead. On its left side, interact with the mushroom on the ground: it is a hidden enemy buried there, and it attacks.
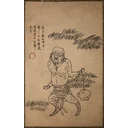
Ch. 3
Chapter 3: at the very start of the chapter, impossible to miss; this golem-like enemy stands in front of you and attacks as soon as the chapter begins.
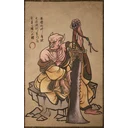
Ch. 3
Chapter 3 > Pagoda Realm > Lower Pagoda: from this shrine, go through the next hallway, where an archer stands, then step out on the right: this enemy, a bat warrior with a broadsword, stands at the edge with its back to you.
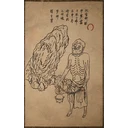
Ch. 3
Chapter 3 > Bitter Lake > Precept Corridor: from this shrine, turn around, cross the wooden bridge and enter the alcove on the right, where this small enemy with a chain censer kneels on the ground.
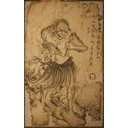
Ch. 3
Chapter 3 > Valley of Ecstasy > Towers of Karma: this drummer-like enemy stands right in front of the shrine. To find the shrine, go through the gate to the left of Forest of Felicity, then head to the leftmost area.
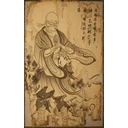
Ch. 3
Chapter 3 > New Thunderclap Temple > Temple Entrance: common all over New Thunderclap Temple; a monk in a red robe who fights with his fists.
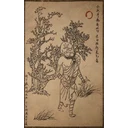
Ch. 3
Chapter 3 > Valley of Ecstasy > Towers of Karma: just left of this shrine; a strong enemy holding 2 sickles.
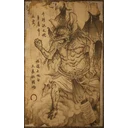
Ch. 3
Chapter 3: at the very start of the chapter, the 2nd enemy you meet, on the mandatory story path, impossible to miss. It looks like a bat.
Ch. 3
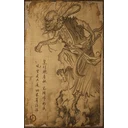
Chapter 3 > Snowhill Path > Frost-Clad Path: story enemy met automatically, the first one after the chapter's first shrine; it attacks after a cutscene. It looks like an ice warrior with a mace.
Ch. 3
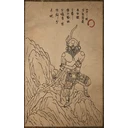
Chapter 3 > Snowhill Path > Frost-Clad Path: past the Macaque Chief miniboss, straight ahead in the next area; a shirtless man who throws a boomerang at you.
Ch. 3
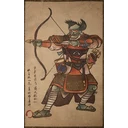
Chapter 3 > Pagoda Realm > Lower Pagoda: in the hallway right after this shrine, on the story path, so impossible to miss. It looks like an archer.
Ch. 3
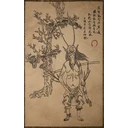
Chapter 3 > Pagoda Realm > Lower Pagoda: all through the corridors after this shrine; a small vampire warrior with a sickle.
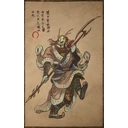
Ch. 3
Chapter 3 > Pagoda Realm > Upper Pagoda: in the corridor to the right of this shrine; a stronger enemy that looks like a vampire monk in robes.
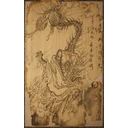
Ch. 3Missable
Chapter 3 > Pagoda Realm > Lower Pagoda: after the fight against the ice dragon Kang-Jin Loong, you wake up in a prison cell. Wait until your eyes glow red, which happens from time to time in this area: this new enemy then shows up, wandering the path in front of the cells, a big skeleton with glowing lamps hanging from its spine.
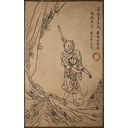
Ch. 3
Chapter 3 > Pagoda Realm > Lower Pagoda: on the upper floor of the prison area, on the way to the Upper Pagoda shrine. This stronger enemy with a long sword or lance stands in a corridor the story path goes through.
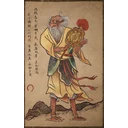
Ch. 3
Chapter 3 > Pagoda Realm > Mani Wheel: from this shrine, turn around and walk to the end of this floor (the shrine's floor): this winged enemy appears at the end of the path.
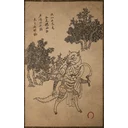
Ch. 3
Chapter 3 > Bitter Lake > Precept Corridor: the first enemy right after this shrine, wearing a yellow robe.
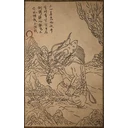
Ch. 3
Chapter 3 > Valley of Ecstasy > Longevity Road: from this shrine, go down the snowy slope on the left and follow the path along the cliff to a big enemy with a cat mask and a hammer, in front of a golden vase holding an Awaken Wine Worm.
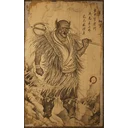
Ch. 3
Chapter 3 > Valley of Ecstasy > Brook of Bliss: from this shrine, turn around: this mage with a scepter, who casts lightning, stands at the end of the bridge.
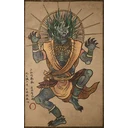
Ch. 3
Chapter 3 > Valley of Ecstasy > Longevity Road: immediately right of this shrine; despite its colossus-like size, it counts as a regular enemy rather than a boss.
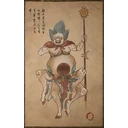
Ch. 3
Chapter 3 > New Thunderclap Temple > Temple Entrance: from this shrine, keep going straight and you run into this 4-legged creature that shoots fire from its belly.
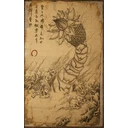
Ch. 3
Chapter 3 > Pagoda Realm > Snow-Veiled Trail: from this shrine, go straight up the slope, then take the left path to meet a flower worm, an enemy that looks like a worm coming out of the ground.
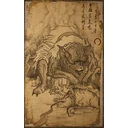
Ch. 4
Chapter 4: added to the Journal automatically at the start of the chapter, impossible to miss.
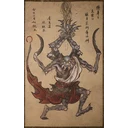
Ch. 4
Chapter 4 > Village of Lanxi > Estate of the Zhu: the first enemy of the chapter, impossible to miss; a big spider.
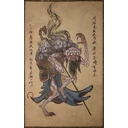
Ch. 4
Chapter 4 > Village of Lanxi > Estate of the Zhu: in the chapter's first village; a mage holding a staff, with a big fungus growing on his back.
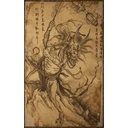
Ch. 4
Chapter 4 > Village of Lanxi > Estate of the Zhu: in the chapter's first village; a man carrying a lantern.
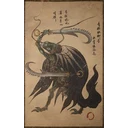
Ch. 4
Chapter 4 > Village of Lanxi > Estate of the Zhu: in the chapter's first village; a green beetle warrior with 2 swords.
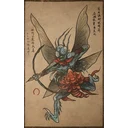
Ch. 4
Chapter 4 > Village of Lanxi > Estate of the Zhu: in the chapter's first village; a flying fairy with a bow.
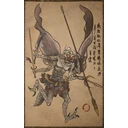
Ch. 4
Chapter 4 > Village of Lanxi > Estate of the Zhu: from where you fought The Second Sister, go right in the boss arena: this gray flying wasp with a spear is in the corner.
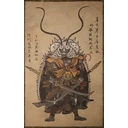
Ch. 4
Chapter 4 > Village of Lanxi > Estate of the Zhu: in the chapter's first village; a white beetle warrior with 2 swords.
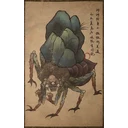
Ch. 4
Chapter 4 > Village of Lanxi > Estate of the Zhu: in the chapter's first village, around a gold chest just before this shrine; a small spider.
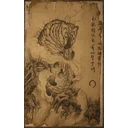
Ch. 4
Chapter 4 > Webbed Hollow > Cliff of Oblivion: in the spider caves between this shrine and the next one, Lower Hollow.
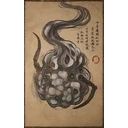
Ch. 4
Chapter 4 > Webbed Hollow > Upper Hollow: from this shrine, take the right-hand path; along the story route to the next shrine, spider legs lash out of the cocoons you pass.
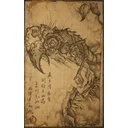
Ch. 4
Chapter 4 > Webbed Hollow > Upper Hollow: from this shrine, take the right-hand path; a scorpion enemy blocks the main path to the next shrine.
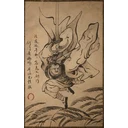
Ch. 4
Chapter 4 > Temple of Yellow Flowers > Mountain Trail: just right of the shrine, on the cliff; it looks like a masked human.
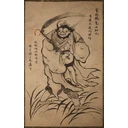
Ch. 4
Chapter 4 > Temple of Yellow Flowers > Mountain Trail: after this shrine, upstairs in the next area; a human dressed in yellow.
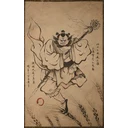
Ch. 4
Chapter 4 > Temple of Yellow Flowers > Mountain Trail: shortly after this shrine, you climb some stairs and face a temple-like building guarded by 2 spearmen in yellow robes.
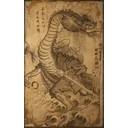
Ch. 4
Chapter 4 > Temple of Yellow Flowers > Mountain Trail: a little past this shrine on the main path; a lizard carrying a poison sac on its back.
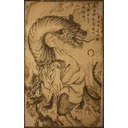
Ch. 4
Chapter 4 > Temple of Yellow Flowers > Mountain Trail: on the main path past this shrine, where a big tree stands in the middle of an area; it looks like a long-necked tiger.
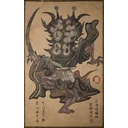
Ch. 4
Chapter 4 > Temple of Yellow Flowers > Mountain Trail: along the main path, about 1 to 2 minutes after this shrine; a monster with a spiky head.
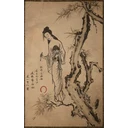
Ch. 4
Chapter 4 > Secret: Purple Cloud Mountain > Valley of Blooms: facing the shrine, drop down on its left where there is water; past the water, defeat the big blue-glowing tree enemy for the spirit.
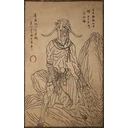
Ch. 5
Chapter 5: met automatically at the start of the chapter, in the first waves of enemies.
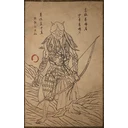
Ch. 5
Chapter 5: met automatically at the start of the chapter, in the first waves of enemies.
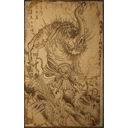
Ch. 5
Chapter 5: met automatically at the start of the chapter, in the first waves of enemies, in front of the Ashen Pass I shrine.
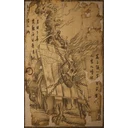
Ch. 5
Chapter 5 > Woods of Ember > Camp of Seasons: from this shrine, cross the next bridge; this small fire-spitting enemy with a book hanging from its neck waits in a tunnel.
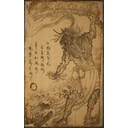
Ch. 5
Chapter 5 > Woods of Ember > Camp of Seasons: from this shrine, cross the next bridge and go through the tunnel; this fiery figure with a sword is straight ahead.
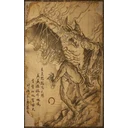
Ch. 5
Chapter 5 > Woods of Ember > Camp of Seasons: follow the path from this shrine; the fire bat you see hanging in a cave is this enemy.
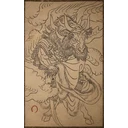
Ch. 5
Chapter 5 > Woods of Ember > Ashen Pass I: on the path right after this shrine.
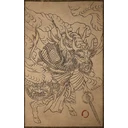
Ch. 5
Chapter 5 > Woods of Ember > Ashen Pass I: on the path right after this shrine.
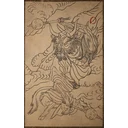
Ch. 5
Chapter 5 > Furnace Valley > Rakshasa Palace: from this shrine, cross the stretch of lava on the left; in the far corner, on the lava, defeat the bull wielding 2 maces.
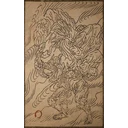
Ch. 5
Chapter 5 > Furnace Valley > Valley Entrance: around this shrine; a big walking lava rock.
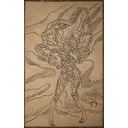
Ch. 5
Chapter 5 > Furnace Valley > Valley Entrance: around this shrine; a small walking lava rock.
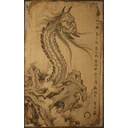
Ch. 5
Chapter 5 > Furnace Valley > Valley Entrance: from this shrine, go down the path to a lava lake on the right, where this worm that spits fireballs waits.
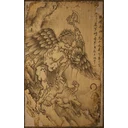
Ch. 5
Chapter 5 > Furnace Valley > Valley Entrance: from this shrine, go down the path to a lava lake on the right and cross it to find this gargoyle-like enemy (wings and an axe) near a gold chest.
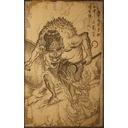
Ch. 5
Chapter 5 > Furnace Valley > Valley Entrance: the big-shield enemy standing right in front of this shrine.
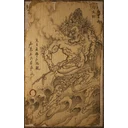
Ch. 5
Chapter 5 > Furnace Valley > Rakshasa Palace: from this shrine, go upstairs and over the bridge to face 2 giant Rakshasas with shields, larger than most bosses. The way to the next shrine passes right by them, so they cannot be missed.
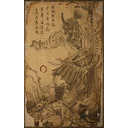
Ch. 5
Chapter 5 > Furnace Valley > Rakshasa Palace: on the main path right after this shrine; a fire mage with a staff who casts fire spells.
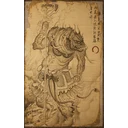
Ch. 5
Chapter 5 > Furnace Valley > Rakshasa Palace: on the main path after this shrine. Once upstairs and over a bridge, this enemy stands on the right past the bridge: a big rhino with a fire weapon, larger than the other enemies around.
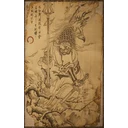
Ch. 6
Chapter 6: story enemy met automatically at the start of the chapter on the main path, impossible to miss; a masked enemy with a spear.
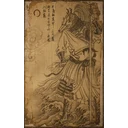
Ch. 6
Chapter 6: story enemy met automatically at the start of the chapter on the main path, impossible to miss; a masked enemy with a spear (a different variant from the Eagle Soldier).
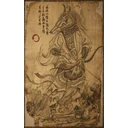
Ch. 6
Chapter 6: story enemy met automatically at the start of the chapter on the main path, impossible to miss; a masked archer.
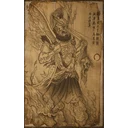
Ch. 6
Chapter 6: story enemy met automatically at the start of the chapter on the main path, impossible to miss; a big masked man with a sword and a shield.
Yaoguai Chiefs Yaoguai Chief 0/55
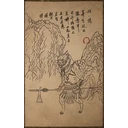
Ch. 1
Chapter 1 > Forest of Wolves > Front Hills: in the forest, after the 1st boss.
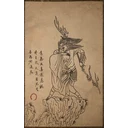
Ch. 1
Chapter 1 > Forest of Wolves > Outside the Forest: from this fast travel point, go left, cross the wooden bridge, then let the torches along the path lead you to the boss arena at the end. The boss is a big wolf wielding a flaming staff.
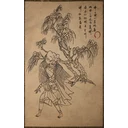
Ch. 1
Chapter 1 > Bamboo Grove > Snake Trail: facing this fast travel point, jump over the cliffs on the left to reach the lower area with a river. Turn right, pass a snake enemy and enter a large bamboo area; follow the paved path to its end, past 2 torches, to reach this boss.
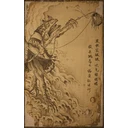
Ch. 1
Chapter 1 > Bamboo Grove > Snake Trail: facing this fast travel point, jump over the cliffs on the left to reach the lower area with a river. Turn left and follow the river to its end to find this boss, a big toad.
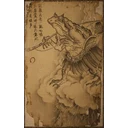
Ch. 2
Chapter 2 > Sandgate Village > Village Entrance: to the left of this shrine, drop down into the ravine and follow the path down. At its end, this frog miniboss waits in a flooded area.
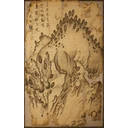
Ch. 2
Chapter 2 > Sandgate Village > Village Entrance: to the left of this shrine, cross the wooden bridge, then turn right to find the village entrance in the corner. In the courtyard, look on the left for a breakable wall under a roof where a Rat Archer stands (or follow the path on the left at the end of the village): it leads to this miniboss's area.
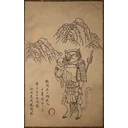
Ch. 2
Chapter 2 > Sandgate Village > Village Entrance: to the left of this shrine, cross the wooden bridge, then turn right to find the village entrance in the corner. Cross the courtyard and turn right to a locked wooden gate: open it to start the fight. You face both bosses at once, but only the big armored one (Second Rat Prince) has to be defeated.
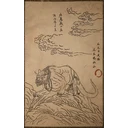
Ch. 2
Chapter 2 > Sandgate Village > Valley of Despair: from this shrine, take the path on the right into a cave. After 2 enemies, turn left in the next part of the cave to trigger a cutscene: the small rat boss from earlier shows up and summons this new boss.
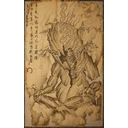
Ch. 2
Chapter 2 > Fright Cliff > Squall Hideout: from this shrine, take the left path until you can climb up to a cave. Go right, then take the next left up a path. At its end, attack the 3 glowing blue crystals on a rock: they are the boss itself, in the cave just before the Rockrest Flat shrine. The boss never attacks; it only summons lesser rock enemies, and once they are down it is defenseless.
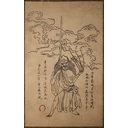
Ch. 2
Chapter 2 > Yellow Wind Formation > Windrest Hamlet: on the next bridge, right after this shrine.
Ch. 2
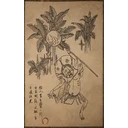
Chapter 2 > Yellow Wind Formation > Windseal Gate: he stands in front of a tree, along the path to the left of this altar.
Ch. 2
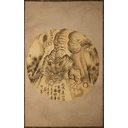
Chapter 2: defeat the Tiger's Acolyte chief to get the Old Rattle-Drum, then use it at 3 places to open the way into the well. 1) Yellow Wind Formation > Windseal Gate: take the path left of the shrine, cross a bridge and turn left into a side area; when the screen turns gray, interact with the surroundings to use the Old Rattle-Drum. 2) Yellow Wind Formation > Windrest Hamlet: from this shrine, turn around, go down the stairs and through the gate, then search the side of the village where a few Withered Corpse enemies sit to use the drum again. 3) Sandgate Village > Village Entrance: in the village where you fought the Earth Wolf chief, search its corner to use the drum once more and watch a cutscene; then jump into the well to start the Mad Tiger fight.
Ch. 2Kingdom of Sahali version
Chapter 2 > Secret: Kingdom of Sahali > Sandgate Pass: opens in Chapter 2 through the boar's questline. 1) Fright Cliff > Rockrest Flat: from this shrine, go straight and talk to the drunken boar. 2) Yellow Wind Formation > Windrest Bridge: from this shrine, cross the bridge, go left towards the houses, then right into a courtyard; in a house in the left corner, smash the golden-glowing keg to get the Sobering Stone key item. 3) Go back to the boar, give him the Sobering Stone and exhaust his dialogue. 4) Crouching Tiger Temple > Temple Entrance: from this shrine, go upstairs and take the 2nd path on the right; talk to the boar there, give him 1 Jade Lotus (sold at the shrine store) and exhaust his dialogue. 5) Return to where you first met the boar at Rockrest Flat: his brother, the Yellow-Robed Squire, appears there; defeat him. 6) Follow the boar through the gate into the Kingdom of Sahali: the next boss is the secret version of Tiger Vanguard.
Ch. 3
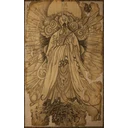
Chapter 3 > Pagoda Realm > Upper Pagoda: from this shrine, turn around and drop down the cliff right across from it to reach this hidden boss in a prison cell.
Ch. 3
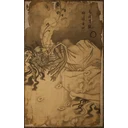
Chapter 3 > Valley of Ecstasy > Longevity Road: to the right of this shrine, at the edge of the area, interact with a giant's corpse to collect The Spirit of Captain Void-Illusion, which also unlocks his Journal entry (before patch 1.0.8 the entry was only added after Chapter 3; since 1.0.8 it unlocks as soon as you collect the spirit).
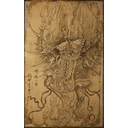
Ch. 3
Chapter 3 > Valley of Ecstasy > Longevity Road: go straight from the shrine, then take the path to the right; he waits in front of a glowing red barrier.
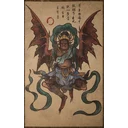
Ch. 3Missable
Chapter 3 > Bitter Lake > North Shore of the Bitter Lake: from this shrine, go straight ahead and follow the shoreline on the right to its end, where a cutscene introduces this boss, a bat in golden armor. Missable: it has to be done in Chapter 3, on your first visit to North Shore of the Bitter Lake, before Zhu Bajie (the little boar) leaves your party.
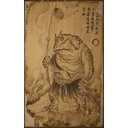
Ch. 3
Chapter 3 > Valley of Ecstasy > Forest of Felicity: from this shrine, turn around and enter the cave on your right: this frog boss is behind it.
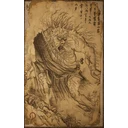
Ch. 3
Chapter 3 > Valley of Ecstasy > Towers of Karma: from this shrine, turn left to see a regular enemy with sickles standing in front of a mural. To his right, follow the path to the corner of the area, where there is what looks like a small stone tower or altar. Interact with the plant on the ground in front of it: pulling it out reveals this hidden boss, buried underground. If you have not found the Towers of Karma shrine yet, start from the Forest of Felicity shrine, go through the torii gate on the left and drop down on the left side to the lower area: the shrine is at the back left of that area.
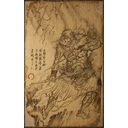
Ch. 3
Chapter 3 > Valley of Ecstasy > Mindfulness Cliff: story boss impossible to miss, right after this shrine on the main path. You fight him twice: after his first defeat he flees and reappears further up the same path, about 1 minute on foot.
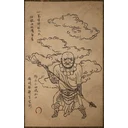
Ch. 3
Chapter 3 > New Thunderclap Temple > Temple Entrance: from this shrine, keep going straight to an area with 2 big colossus enemies and enter the building on their right to fight this boss. A meditation spot is also there once he is defeated.
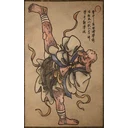
Ch. 3
Chapter 3 > Valley of Ecstasy > Brook of Bliss: up the slope to the right of this shrine; at the top, circle around on the right to reach the Non-Able boss.
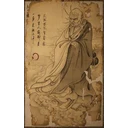
Ch. 3
Chapter 3: at the end of the fox questline. 1) At Valley of Ecstasy > Forest of Felicity, talk 3 times to the corpse in front of a gate to turn into a fox and receive the Snow Fox Brush. 2) Progress the story to New Thunderclap Temple. From New Thunderclap Temple > Temple Entrance, go straight through the next temple, climb the stairs, take the left path down, go straight into the next building and upstairs inside; from there, cross a wooden bridge up to a temple where the monk you are looking for waits. Only fox form triggers the cutscene and the Non-Void fight: use the Snow Fox Brush from your inventory to turn into the fox.
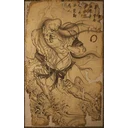
Ch. 3
Chapter 3 > New Thunderclap Temple > Temple Entrance: from this shrine, take the path on the right. Go up the path, then leave the courtyard through the gate on the left: this boss appears in the left corner of the next area, in front of some monks punching trees. A big tentacled enemy, he hits very hard and freezes you with frost magic. He also drops the Hoarfrost transformation.
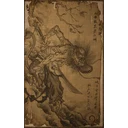
Ch. 3
Chapter 3: added to the Journal automatically at the end of the chapter (your 2 earlier encounters with this boss in Chapter 3 do not count).
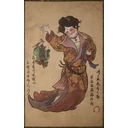
Ch. 4
Chapter 4: added to the Journal automatically once the chapter is complete (after the Hundred-Eyed Daoist Master boss).
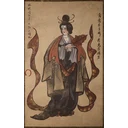
Ch. 4
Chapter 4: added to the Journal automatically once the chapter is complete (after the Hundred-Eyed Daoist Master boss).
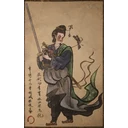
Ch. 4
Chapter 4: added to the Journal automatically once the chapter is complete (after the Hundred-Eyed Daoist Master boss).
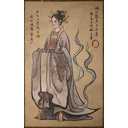
Ch. 4
Chapter 4: added to the Journal automatically once the chapter is complete (after the Hundred-Eyed Daoist Master boss).
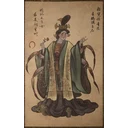
Ch. 4
Chapter 4 > Village of Lanxi > Estate of the Zhu: the fight starts when you go through the next door, right after this shrine.
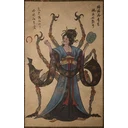
Ch. 4
Chapter 4: added to the Journal automatically once the chapter is complete (after the Hundred-Eyed Daoist Master boss).
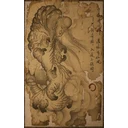
Ch. 4
Chapter 4 > Webbed Hollow > The Verdure Bridge: to the left of this shrine, cross the green bridge, turn left, then right for a cutscene with the lady, then go through the treasure room on the right (5 golden chests). This boss is behind the treasure room.
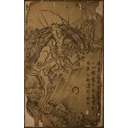
Ch. 4
Chapter 4 > Webbed Hollow > Middle Hollow: it waits below the cliffs ahead of this shrine; head forward and down to reach it.
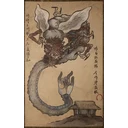
Ch. 4
Chapter 4 > Webbed Hollow > Cliff of Oblivion: in the corridor just past this shrine, interact with the glowing hand.
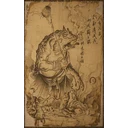
Ch. 4
Chapter 4 > Webbed Hollow > Lower Hollow: from this shrine, turn left into the tunnel. On the left, squeeze through a crack in the wall to find a meditation spot; to its left, follow the corridor to this frog boss.
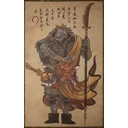
Ch. 4
Chapter 4 > Temple of Yellow Flowers > Forest of Ferocity: past this shrine, in the next area where the Daoists are training; this boss stands behind many of them.
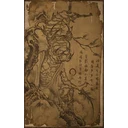
Ch. 4Missable
Chapter 4 > Secret: Purple Cloud Mountain > Petalfall Hamlet: from this shrine, climb the stairs and talk to the NPC on the left. Then defeat the enemies around, again and again, until one of them drops the Violet Hail key item (a fully random drop); resting at the shrine brings the enemies back. With the item in hand, talk to him again to start a boss fight, and defeat him for this entry. Missable: it has to be done before you finish the Chapter 4 secret area (before defeating The Duskveil).
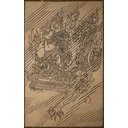
Ch. 5
Chapter 5 > Woods of Ember > Ashen Pass I: from this shrine, go to the next corridor, where many bulls and undead soldiers are fighting. A miniboss, the Pale-Axe Stalwart, appears there. Defeat him, then talk to him until he repeats the same line: he gives you the quest to find all the Five Element Carts of Chapter 5.
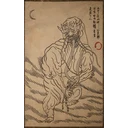
Ch. 5
Chapter 5 > Woods of Ember > Height of Ember: on the main story path, just past this shrine.
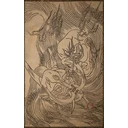
Ch. 5
Chapter 5 > Woods of Ember > Height of Ember: story boss met automatically, impossible to miss.
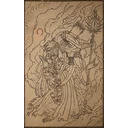
Ch. 5
Chapter 5 > Furnace Valley > Valley Entrance: story boss met automatically, impossible to miss.
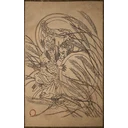
Ch. 5
Chapter 5 > Bishui Cave > Purge Pit: the first boss of the Chapter 5 secret area.
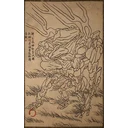
Ch. 5
Chapter 5 > Furnace Valley > Valley Entrance: from this shrine, go forward to a lava lake. Cross it on the left of the main path: he waits inside the lava at the far end. The Fireproof Mantle vessel prevents the fire damage.
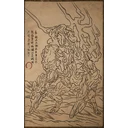
Ch. 5
Chapter 5 > Field of Fire > Fallen Furnace Crater: from Fallen Furnace Crater, turn around and go back down the path where the big ball rolled earlier. Halfway down, on the left, the ball has smashed a barrier: take the new path down on the left to reach this boss, which looks like a mass of magma rocks.
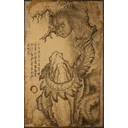
Ch. 5
Chapter 5 > Field of Fire > Fallen Furnace Crater: a little further down the path past the Flint Vanguard boss. From Fallen Furnace Crater, turn around and go back down the path where the big ball rolled earlier; halfway down, on the left, take the path the ball opened through a barrier to reach Flint Vanguard. Past him, keep going down to a glowing red patch of magma on the ground: bring 4 Flame Ore there to summon the Mother of Flamlings. If you die, you have to bring 4 Flame Ore again. Flame Ore drops from the enemies nearby, such as the fire-spitting worms.
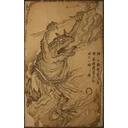
Ch. 5
Chapter 5 > Field of Fire > Cooling Slope: only reachable once the Chapter 5 secret area is unlocked. On the way to the secret area you reach the Cooling Slope shrine automatically, right in front of its entrance. From that shrine, go through the frozen gate towards the secret area (only possible once it is unlocked): this frog boss is on the left side of the big round area, before you actually enter Bishui Cave. Otherwise, after defeating the Chapter 5 secret area boss, Bishui Golden-Eyed Beast, you are teleported back outside and the frog boss is on your right.
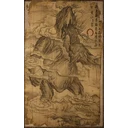
Ch. 6
Chapter 6 > Foothills > Verdant Path: once the cloud-flying spell is unlocked, fly straight to the cliffs at the far end of the area, past the big lake. A big monster sits on the cliff; its glowing green head makes it easy to spot from afar. It is this boss.
Ch. 6
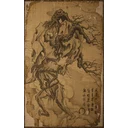
Chapter 6 > Foothills > Verdant Path: once the cloud-flying spell is unlocked, stay on the upper plateau and fly left to a small pond with a square rock sitting on a meadow. Get off the cloud and walk up to the rock: it is a boss, which starts throwing poison balls once you come close. This is on the left (west) side of the upper plateau, before you fly down to the big lake.
Ch. 6
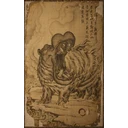
Chapter 6 > Foothills > Verdant Path: once the cloud-flying spell is unlocked, green hippos roam all over the big lake at the bottom of the area; the regular version is also logged as a chief. The real boss version is in the back left corner of the lower lake (on the side you arrive from Verdant Path, not the far corner): fly to the left (west) of the area and watch for ripples in the water, where the boss bursts out.
Ch. 6
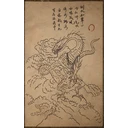
Chapter 6 > Foothills > Verdant Path: once the cloud-flying spell is unlocked, fly straight down from the cliffs to the pool in front of you, below them. Get off the cloud and walk around the pool: the boss leaps out of the water. It cannot be seen from afar and only emerges once you reach the pool's surface.
Ch. 6
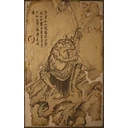
Chapter 6 > Foothills > Verdant Path: once the cloud-flying spell is unlocked, fly down to the big lake in the lower area, then to its back right corner (the one closest to the cliff you started from, not the corner at the other end). This frog boss appears there, in what looks like a brown patch in the corner of the lake; get off the cloud to see it.
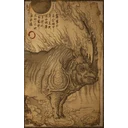
Ch. 6
Chapter 6 > Foothills > Rhino Watch Slope: once the cloud-flying spell is unlocked, stay on the upper plateau and fly right to the edge of the area, a brown patch without trees. A cutscene starts automatically as you approach: this is one of the mandatory story bosses that give the mythical armor pieces, so it cannot be missed. This is before you fly down to the big lake. It looks like a big rhino with gold armor on its back and has a lot of Health.
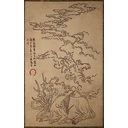
Ch. 6
Chapter 6 > Foothills > Deer Sight Forest: once the flying cloud is unlocked, fly forward over the big lake, then right to the red trees.
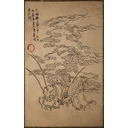
Ch. 6
Chapter 6 > Foothills > Mantis-Catching Swamp: once the cloud-flying spell is unlocked, a big grasshopper hops around the lake area. Fly to its head on the cloud, get off and interact to grab its feelers. You need enough Stamina to hold on until it stops jumping (350 Stamina was enough in one documented attempt). When it stops, grab it again to burn its feelers: this needs high Burn Resistance and a lot of Health (765 Health and over 50 Burn Resistance were enough in that attempt). Xu Dog, at the Chapter 2 Cellar shrine, lets you reset the bonuses from your celestial medicines and reassign your Mind Cores to Burn Resistance and Health, and Body-Cooling Powder raises Burn Resistance for a short time. There is no real boss fight here: it only checks that your Health and Burn Resistance are high enough for the remaining bosses.
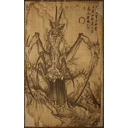
Ch. 6
Chapter 6 > Foothills > Mantis-Catching Swamp: once the cloud-flying spell is unlocked, fly to the top left corner of the lower lake area, where a big yellow tree stands. A cutscene starts this boss fight as you approach. If it does not appear, make sure you have defeated the area's other 3 story bosses for their mythical armor pieces (Gold Armored Rhino, Cloudtreading Deer, Feng-Tail General).
Yaoguai Kings Yaoguai King 0/26
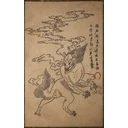
Ch. 1
Chapter 1 > Forest of Wolves > Guanyin Temple: story boss met automatically, impossible to miss.
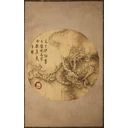
Ch. 1From ch. 2
Chapter 1 > Forest of Wolves > Outside the Forest: this needs the Loong Scales from Chapter 2. Once you have them, fast travel back to Chapter 1. From the Outside the Forest shrine, take the left path to a waterfall in the corner of the area: with the Loong Scales in your inventory, interact with the waterfall to enter this hidden boss's area.
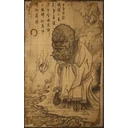
Ch. 1
Chapter 1 > Ancient Guanyin Temple > Grand Chamber: ring all 3 bells of Chapter 1 (behind the Guangzhi, Guangmou and Whiteclad Noble bosses); the 3rd bell teleports you to this secret area automatically.
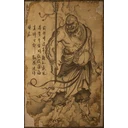
Ch. 1
Chapter 1 > Black Wind Cave > Cave Interior: story boss met automatically, impossible to miss.
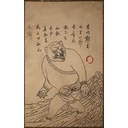
Ch. 1
Chapter 1 > Black Wind Cave > Bodhi Peak: story boss, impossible to miss.
Ch. 2Crouching Tiger Temple version
Chapter 2 > Crouching Tiger Temple > Temple Entrance: from this shrine, climb the stairs straight up to the temple to find this boss.
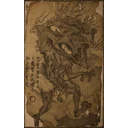
Ch. 2
Chapter 2 > Fright Cliff > Rockrest Flat: this boss is along the left path from this shrine.
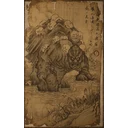
Ch. 2
Chapter 2: in the arena where you fought Stone Vanguard, bring all 6 Buddha's Eyeballs to the big rock carved with faces to make the boss appear.
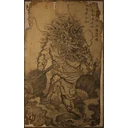
Ch. 2
Chapter 2 > Fright Cliff > Rockrest Flat: this needs the Loong Scales from Chapter 2. Once you have them, go to Rockrest Flat; from the shrine, turn right and go up the path to a waterfall. With the Loong Scales in your inventory, interact with the waterfall to enter this hidden boss's area.
Ch. 2
Chapter 2 > Secret: Kingdom of Sahali > Sandgate Pass: opens in Chapter 2 through the boar's questline. 1) Fright Cliff > Rockrest Flat: from this shrine, go straight and talk to the drunken boar. 2) Yellow Wind Formation > Windrest Bridge: from this shrine, cross the bridge, go left towards the houses, then right into a courtyard; in a house in the left corner, smash the golden-glowing keg to get the Sobering Stone key item. 3) Go back to the boar, give him the Sobering Stone and exhaust his dialogue. 4) Crouching Tiger Temple > Temple Entrance: from this shrine, go upstairs and take the 2nd path on the right; talk to the boar there, give him 1 Jade Lotus (sold at the shrine store) and exhaust his dialogue. 5) Return to where you first met the boar at Rockrest Flat: his brother, the Yellow-Robed Squire, appears there; defeat him. 6) Follow the boar through the gate into the Kingdom of Sahali, defeat Tiger Vanguard there, then talk to the NPC standing on the cliff above the desert: in the cutscene that follows, he summons the Fuban boss.
Ch. 2
Chapter 2 > Crouching Tiger Temple > Cellar: slide down the sand from this shrine, then head left into the tornado.
Ch. 3
Chapter 3 > Snowhill Path > Mirrormere: story boss impossible to miss. From this shrine, head straight for the house on the frozen lake to make the boss appear.
Ch. 3
Chapter 3 > Pagoda Realm > Warding Temple: the fight starts when the path through Warding Temple sends you sliding down a snowy slope.
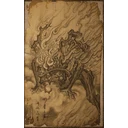
Ch. 3
Chapter 3 > Pagoda Realm > Mani Wheel: story boss impossible to miss, right after this shrine on the main path.
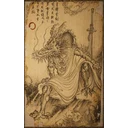
Ch. 3
Chapter 3 > Bitter Lake > Turtle Island: this needs the Loong Scales from Chapter 2. Once you have them, go to Turtle Island; to the right of this shrine, head for the back right corner of the island, where a small dragon statue sits at the edge. As you approach, a cutscene turns it into a living dragon: this boss. It only appears with the Loong Scales in your inventory.
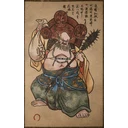
Ch. 3
Chapter 3 > New Thunderclap Temple > Mahavira Hall: story boss impossible to miss, the final boss of Chapter 3.
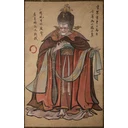
Ch. 4
Chapter 4 > Webbed Hollow > The Gathering Cave: story boss of Chapter 4 met automatically after this shrine, impossible to miss.
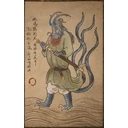
Ch. 4
Chapter 4 > Webbed Hollow > Relief of the Fallen Loong: this needs the Loong Scales from Chapter 2 and the other 3 Loong bosses defeated (Chapter 1: The Red Loong, Chapter 2: Black Loong, Chapter 3: Cyan Loong). The Yellow Loong then appears to the right of the Relief of the Fallen Loong shrine. To get there, start from Webbed Hollow > Cliff of Oblivion, go down the broken hand and follow the path until you can drop down on the left to a hanging bridge. Cross it to a narrow wooden beam surrounded by lashing spider cocoons: use Cloud Step to dash past the cocoons and walk along the beam. At its far end is the hidden area, Relief of the Fallen Loong.
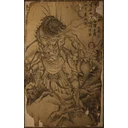
Ch. 4
Chapter 4 > Secret: Purple Cloud Mountain > Bounds of Deity's Abode: past this shrine, a scorpion sits drinking on a rooftop and talks to you as you approach. Smash the kegs below him to anger him and start the fight. If you fight The Duskveil first, it kills The Scorpionlord on its own and you still get the Journal entry, but you lose the gourd The Scorpionlord drops, so fight The Scorpionlord before triggering The Duskveil.
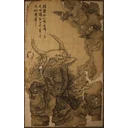
Ch. 4
Chapter 4 > Secret: Purple Cloud Mountain > Cloudnest Peak: the final boss of the Chapter 4 secret area.
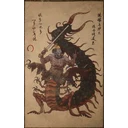
Ch. 4
Chapter 4 > Temple of Yellow Flowers > Court of Illumination: final boss of Chapter 4, impossible to miss.
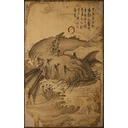
Ch. 5
Chapter 5 > Furnace Valley > The Emerald Hall: main story boss met automatically, right after this shrine.
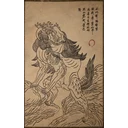
Ch. 5
Chapter 5 > Bishui Cave > Corridor of Fire and Ice: the last boss of the Chapter 5 secret area.
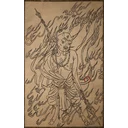
Ch. 5
Chapter 5 > Field of Fire > Fallen Furnace Crater: right after this shrine.
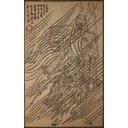
Ch. 5
Chapter 5 > Field of Fire > Fallen Furnace Crater: after defeating the Red Boy boss.
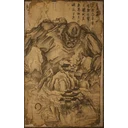
Ch. 6
Chapter 6 > Foothills > Verdant Path: once the cloud-flying spell is unlocked, fly straight to the cliffs at the far end of the area, past the big lake. Beyond the spot where you fight the Son of Stones boss, keep flying to the very end of the upper area, then turn right into the entrance of a narrow canyon; follow it to its end to find this giant rock monster. It faces the waterfall cave you must visit for the story once you hold the 4 mythical armor pieces from the Chapter 6 bosses. It requires the 4 Skandha collectibles; after the fight, walk up its arm to trigger a cutscene and receive the 5th Skandha.
Characters Characters 0/32
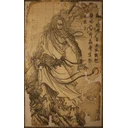
Ch. 1
Chapter 1 > Bamboo Grove > Marsh of White Mist: from the shrine, go down the stairs to find this main boss in the next area, impossible to miss.
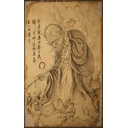
Ch. 1
Chapter 1 > Black Wind Cave > Bodhi Peak: unlocked automatically when you defeat the 4th main boss, Black Bear Guai.
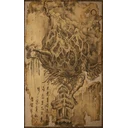
Ch. 2
Fright Cliff > Squall Hideout: from the shrine, take the path on the right through the ravine with a little water. At its end, interact with the black thorns: a man is trapped in them. Give him the Stone Essence key item, dropped by the Mother of Stones boss, which you find by hitting the 3 blue crystals in the cave leading to the next shrine (Rockrest Flat).
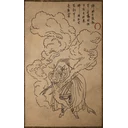
Ch. 2
Chapter 2: opens through the boar's questline. 1) Fright Cliff > Rockrest Flat: from this shrine, go straight and talk to the drunken boar. 2) Yellow Wind Formation > Windrest Bridge: from this shrine, cross the bridge, go left towards the houses, then right into a courtyard; in a house in the left corner, smash the golden-glowing keg to get the Sobering Stone key item. 3) Go back to the boar, give him the Sobering Stone and exhaust his dialogue. 4) Crouching Tiger Temple > Temple Entrance: from this shrine, go upstairs and take the 2nd path on the right; talk to the boar there, give him 1 Jade Lotus (sold at the shrine store) and exhaust his dialogue. 5) Return to where you first met the boar at Rockrest Flat: his brother, the Yellow-Robed Squire, appears there; defeat him.
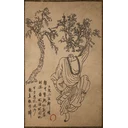
Ch. 2
Chapter 2 > Crouching Tiger Temple > Temple Entrance: after defeating the Tiger Vanguard boss, interact with the statue in its arena. In the cutscene, the blood drains from the arena and a hatch opens in the floor: drop through it and follow the path through the cellar to another cutscene, after which this Journal entry is added automatically.
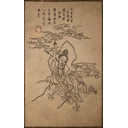
Ch. 2
Chapter 2: unlocked automatically during the final cutscene of the chapter, after the Yellow Wind Sage main boss.
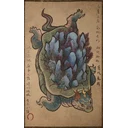
Ch. 3
Chapter 3 > Bitter Lake > North Shore of the Bitter Lake: from this shrine, follow the shoreline straight ahead to the end of the coast, where you meet the optional Apramana Bat boss; defeat it. Then interact with the big skeleton on the left: in the cutscene, the great turtle island sheds a green tear, and the Journal entry for Turtle General (the turtle island itself) is added. The tear can also be picked up as a soak, on the beach below the big turtle's head.
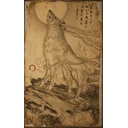
Ch. 3
Chapter 3: unlocked in the Journal once the fox side questline is complete.
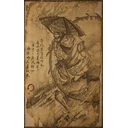
Ch. 3
Chapter 3: unlocked in the Journal once the Treasure Hunter's side questline is complete.
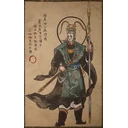
Ch. 3
Unlocked by completing the prisoner quest (the Captain Spirits quest) in Chapter 3. He is the NPC in the prison cell at Pagoda Realm > Lower Pagoda: his entry unlocks once you collect the 4 Captain Spirits and bring them to him.
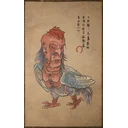
Ch. 3
Chapter 3: unlocked in the Journal once the chapter is complete.
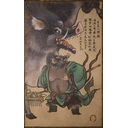
Ch. 4
Chapter 4 > Webbed Hollow > Hut of Immortality: right after this shrine, the main story boss, impossible to miss. You fight him twice in a row; the Journal entry comes after the 2nd fight.
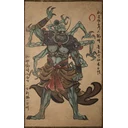
Ch. 4
Chapter 4: defeated on the way to the Chapter 4 secret area.
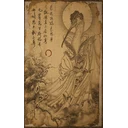
Ch. 4Missable
Chapter 4: added to the Journal once the quest of the 4 purple altars is complete. After you interact with all 4 altars, the Supreme Celestial Inspector attacks; after that fight, the Crane Immortal speaks to you in a cutscene, which adds his entry. Missable: it has to be done before completing Chapter 4 (before the Hundred-Eyed Daoist Master main boss); after Chapter 4 the purple altars can no longer be used. It is still possible in New Game+ if you missed it.
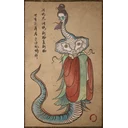
Ch. 4
Chapter 4: added to the Journal automatically once the chapter is complete (after the Hundred-Eyed Daoist Master boss).
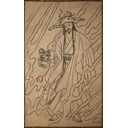
Ch. 5
Chapter 5 > Furnace Valley > The Emerald Hall: main story boss met automatically, right after this shrine.
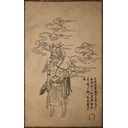
Ch. 5Missable
Chapter 5 > Furnace Valley > Valley Entrance (after finishing Chapter 5): from this shrine, walk down the path and enter the lava pool on the right. In the corner of the lava, a stuck Element Cart sits among many enemies (the cart does not attack). Interact with it to pull out a string, which unlocks this character's entry. This is not possible during Chapter 5: finish the chapter first, then come back.
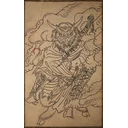
Ch. 5
Chapter 5: for completing the Five Element Carts questline given by the Pale-Axe Stalwart (the ox NPC). The entry is added after you defeat the last cart and talk to him; the Chapter 5 secret area then opens.
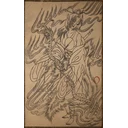
Ch. 5
Chapter 5: added to the Journal automatically once the chapter is complete.
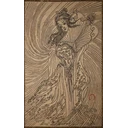
Ch. 5
Chapter 5: added to the Journal automatically once the chapter is complete.
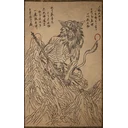
Ch. 5
Chapter 5: added to the Journal automatically once the chapter is complete.
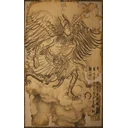
Ch. 6
Chapter 6 > Foothills > Verdant Path: story boss met automatically, the first boss of Chapter 6.
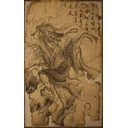
Ch. 6
Chapter 6: added to the Journal when you defeat the Giant Shigandang; then walk up its arm to get the 5th Skandha.
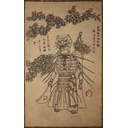
Ch. 3
Chapter 3: first finish the Chen Loong questline, which ends in a hidden area, Zodiac Village. In its left corner, talk to the blacksmith, challenge him to a duel and defeat him.
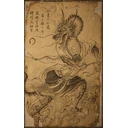
Ch. 3
Chapter 3: unlocked by finishing the Chen Loong questline.
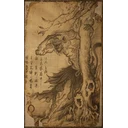
Ch. 1
Chapter 1 > Bamboo Grove > Marsh of White Mist: from the shrine, go down the stairs and defeat the lone snake enemy. In the cutscene that follows, you rescue the Shen Monkey; follow him into his cave and talk to him.
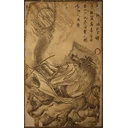
Ch. 2
Chapter 2 > Crouching Tiger Temple > Cellar: explore the area to the right of this shrine and Xu Dog climbs out of a vase. If he is not there, make sure you defeated the Lang-Li-Guhh-Baw boss at Sandgate Village > Village Entrance and talked to Xu Dog at the top of the stairs before that boss.
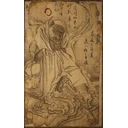
Ch. 6
Chapter 6: added to the Journal automatically at the end of the game, once you reach its final shrine, Birthstone > Heart of Birthstone.
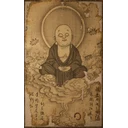
Ch. 6
Obtained through the secret ending.
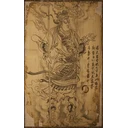
Ch. 6
Obtained through the secret ending.
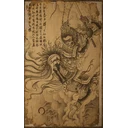
Ch. 6MissableNG+Future cycle
New Game+ only: added to the Journal once New Game+ begins. After defeating the final boss, choose Enter a New Cycle on the title screen. Warning: starting New Game+ overwrites your current save, so finish any remaining content first; there is no way back once it begins.
Ch. 6MissableNG+Future cycle
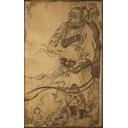
Added automatically once every other Journal entry is unlocked (all Lesser Yaoguai, Chiefs, Kings and Characters); he is the last entry you unlock.
Entries without a portrait
Ch. 1Missable
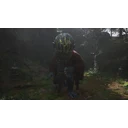
Chief without its own portrait (single source); spirit + Cat Eye Beads curio are missable (before the 3rd bell / Elder Jinchi).
Ch. 4
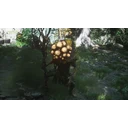
No portrait (single source); drops Sunset of the Nine Skies and a Knot of Voidness; needed for 'Souls in the Stalks'.
Ch. 5
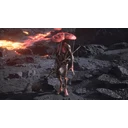
No portrait.
Ch. 3
No portrait (single source). The spirit drops from a blue shining Fungiling at Pagoda Realm > Upper Pagoda. The enemy itself has no official EN label in the sources.
Ch. 6
No portrait (single source, location Mount Huaguo).
Ch. 6
Final boss phase 1, no portrait (single source).
Ch. 3
Final (Dharma/giant) form of Erlang in Mount Mei, fought after The Four Heavenly Kings. Not a separate in-game portrait (Erlang's Character portrait unlocks after this fight).