
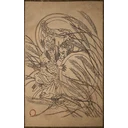
Purge Pit
Top Takes Bottom, Bottom Takes Top兴烘掀、掀烘兴
- What it inflicts
- No status effect
- Phases
- 2 phases2 health bars, one per foe; when one drops below half, they merge into a ball
- Equipment
- One setno shrine or checkpoint between the phases
Recommended gear
With what you can have when you first come across it.
Editor's pick Immobilize is your main tool against the duo: the 4 Bronze pieces deal extra damage when you crash an immobilization and then greatly shorten its cooldown, and the Stranded Loong's Whisker extends your next Immobilize after a sip. The Amber Prayer Beads speed up your Focus, for the heavy attacks that stagger them, and the Fireproof Mantle protects you from the burning ground. As an alternative to the mask, See No Evil makes Perfect Dodges easier to trigger, precious against the ball.
- Weapon attack
- 80
- Armor defense
- 74
- Resistance: Burn
- +7
Base values, before upgrades, from the registry.
- Weapon
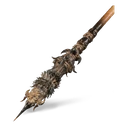 Chitin Staff Crafting: Venomous Hair × 1, Refined Iron Sand × 4, Yaoguai Core × 8, 20,000 Will
Otherwise: Staff of Blazing Karma
- Headgear
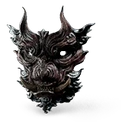 Bronze Monkey Mask Crafting: Yarn × 4, Silk × 2, 1,800 Will
Otherwise: See No Evil
- Chest
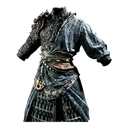 Bronze Brocade Battlerobe Crafting: Yarn × 5, Silk × 2, 2,000 Will
Otherwise: Golden Embroidered Shirt
- Arms
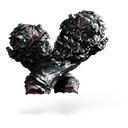 Bronze Armguard Crafting: Yarn × 1, Silk × 1, 810 Will
Otherwise: Non-Pure Gauntlets
- Legs
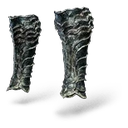 Bronze Buskins Crafting: Yarn × 2, Silk × 1, 1,080 Will
Otherwise: Non-Pure Greaves
- Vessel
Otherwise: Weaver's Needle
- Spirit
Otherwise: Father of Stones
- Transformation
Otherwise: Azure Dust
- Spells
- Curios
- Gourd
Otherwise: Medicine Buddha Gourd, Xiang River Goddess Gourd
- Soaks
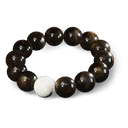
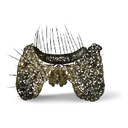
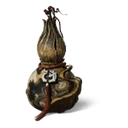
The Staff of Blazing Karma adds Defense and Burn Resistance if you beat the Flint Chief, the Flint Vanguard and the Mother of Flamlings, for their 3 Samadhi Fire Crystals, and have Shigandang's Cloud-Patterned Stone Staff, 4 Gold Tree Cores and 30,000 Will; otherwise, keep the Chitin Staff.
The fight
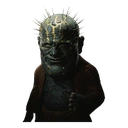
A single fight against 2 foes, each with its own health bar, a sword and half of the ball as a shield. They take turns: one attacks while the other hangs back, then they switch. When one of them drops below half health, they close up into a spiked ball, which rolls at you several times, then leaps and explodes on every impact. After that, they take turns again until one falls; the second, on its own, is much easier.
One set: a single fight, with no shrine or pause.
Spells, transformation and soaks are set at a Keeper's Shrine (soaks also with the Shen Monkey), never during a fight: what you bring into a fight stays until the end. One spell per category: Cloud Step and Rock Solid exclude each other, pick one before the fight.
What it inflicts
- No status named: Top Takes Bottom's glowing-blade leap makes pools of lava explode beneath it, and the ground burns in places throughout the fight, fire damage; the Fireproof Mantle protects you from it.
Attacks to watch
- Rolling ball, the most dangerous of their attacks: merged, they roll at you several times in a row, up to 8 times. Run sideways and dodge at the last moment: the Perfect Dodge often lands later than you'd think.
- End of the ball: it leaps up to 5 times and explodes on every impact. Jump as it lands or time your dodges; perched on your staff in Pillar Stance, you avoid the whole sequence.
- Top Takes Bottom throws its sword like a boomerang: dodge quickly, then strike while it retrieves it. It also leaps with a glowing blade, and pools of lava explode beneath it: jump back as soon as the blade hits the ground and glows.
- Bottom Takes Top leaps at you, then rolls into its half of the ball; then, sword put away, it jumps, slams the ball down and drags it around itself. Keep your distance, and strike while it recovers. Both can also roll in their half and charge across the arena.
What works
- Open with your spells, Immobilize above all, on one of them, then focus on whichever has less health: it eventually shells up, and you switch to the other. Once one is down, the rest is easy. Immobilize
- Their half-balls protect them: your hits on them don't hurt them, and they often raise them during your charged Heavy Attacks. Hit whichever doesn't have its shield up; well timed, your heavy attacks stagger them and knock their shields down.
- When they start swapping, Cloud Step throws them off and Immobilize keeps them from zipping around the arena. Cloud Step, Immobilize
- Fireproof Mantle: equipped, it spares you the damage from the burning ground throughout the fight. Fireproof Mantle
Strategy
- Keep the foe hanging back in your field of view: they keep switching between attacking and standing back, and the other one can blindside you.
- They don't have much health, but their shields make them hard to burst down: be patient.
- The Screen meditation spot is close by: with your back to the Purge Pit shrine, go right and down the stairs to the end of the path. The Screen, Purge Pit
- No rush: Bishui Cave remains accessible after the end of the story.
Access
Bishui Cave, Purge Pit shrine, the secret area's first: go past it and down to the arena, in the middle of the large room. To enter the cave, finish the Pale-Axe Stalwart's Five Element Carts quest: beat the Rusty-Gold Cart in front of the Cooling Slope's frozen gate, talk one last time to the dying Pale-Axe Stalwart, touch the gate, then head to the middle of the next room. Optional. The big spiked golden ball that rolls down the slope after the Ashen Pass III shrine is them: there, you avoid it by sheltering in the alcoves.
What it gives
- to obtainRefined Iron Sand
- to obtainGold Tree Core
Will: 4,456
Their spirit doesn't drop in the arena: you take it from the iron ball lodged in the rock past The Emerald Hall. From the shrine, cross the palace and head up toward the Ashen Pass: it is next to the Flame Rhino Master, after the first flight of stairs. It only appears once the ball has fallen off the cliff; if the spirit isn't there, come back after your win over the duo.
Equipped, this spirit significantly raises your Defense but moderately lowers your Attack; when used, the two form an iron ball that bounces and strikes 3 times in a row.
After the fight, climb the stairs and go through the large doorway: on the way down, a small alcove on the left, behind a small Buddha statue, hides a Celestial Nonary Pill in a golden pot.
Updates
Update 1.0.20: fixed Top Takes Bottom, Bottom Takes Top becoming undefeatable, and the iron ball not displaying properly during the fight, under certain conditions.
In NG+
In NG+, you keep your gear, spells, transformations and spirits, and bosses are tougher. Key items don't carry over: the chapter's quest items must be taken again.
Page checked on October 17, 2026.