
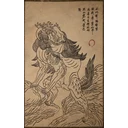
Corridor of Fire and Ice
Bishui Golden-Eyed Beast璧水金睛兽
- What it inflicts
- Burn Chill
- Phases
- 3 phasesup to 3 arenas: fire, then ice and fire, which open when you lure the Beast there
- Equipment
- One setno shrine or checkpoint between the phases
Recommended gear
With what you can have when you first come across it.
Editor's pick No shrine between the arenas: this set holds against the Burn of the fire arenas, and against the Chill of the frozen room if you lure the Beast there. Against Burn, the Fireproof Mantle, the Bronze Monkey Mask and Bronze Armguard, the Flame Orb, dropped by the Rusty-Gold Cart on the way to the cave, and the Flint Vanguard spirit raise your resistance; against Chill, the Golden Greaves and the Frostsprout Twig raise your Chill Resistance, and Umbral Abyss makes you immune to Chill while transformed. Worn together, the Bronze mask and armguard deal extra damage when you crash an immobilization, which the Stranded Loong's Whisker extends after a sip, and the Golden shirt and greaves raise your Attack right after your spirit or your Mantle.
- Weapon attack
- 80
- Armor defense
- 143
- Resistance: Burn
- +7
- Resistance: Chill
- +4
Base values, before upgrades, from the registry.
- Weapon
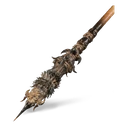 Chitin Staff Crafting: Venomous Hair × 1, Refined Iron Sand × 4, Yaoguai Core × 8, 20,000 Will
Otherwise: Staff of Blazing Karma
- Headgear
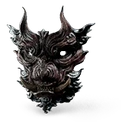 Bronze Monkey Mask Crafting: Yarn × 4, Silk × 2, 1,800 Will
Otherwise: Golden Mask of Fury
- Chest
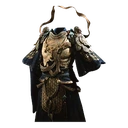 Golden Embroidered Shirt Crafting: Cold Iron Leaves × 5, Fine Gold Thread × 2, 8,000 Will
Otherwise: Ginseng Cape
- Arms
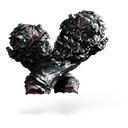 Bronze Armguard Crafting: Yarn × 1, Silk × 1, 810 Will
Otherwise: Ebongold Armguard
- Legs
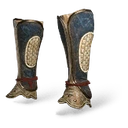 Golden Greaves Crafting: Cold Iron Leaves × 2, Fine Gold Thread × 1, 4,800 Will
Otherwise: Ochre Greaves
- Vessel
- Spirit
Otherwise: Clay Vajra, Crow Diviner
- Transformation
Otherwise: Azure Dust
- Spells
- Curios
- Gourd
Otherwise: Xiang River Goddess Gourd, Fiery Gourd
- Soaks
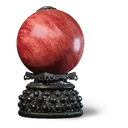
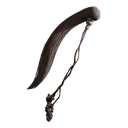
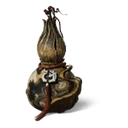
The Staff of Blazing Karma adds Defense and Burn Resistance if you beat the Flint Chief, the Flint Vanguard and the Mother of Flamlings, for their 3 Samadhi Fire Crystals, and have Shigandang's Cloud-Patterned Stone Staff, 4 Gold Tree Cores and 30,000 Will; otherwise, keep the Chitin Staff.
The Flame Mediator is a random drop from the Field of Fire's Searing-Fire and Scorching-Fire enemies: if you have one, equip it in place of the Stranded Loong's Whisker, it raises your Burn Resistance for a short time after each sip.
For more Chill Resistance, the Ginseng Cape can replace the Golden shirt, at the cost of the Attack bonus, and the Crow Diviner the Flint Vanguard spirit. Instead of the Supreme Gourd's extra sips, you can take the Xiang River Goddess Gourd, which raises your Burn Resistance for a short time after each sip, or the Fiery Gourd, which then makes you immune to Chill.
The fight
A single fight, with no shrine. It starts in an arena partly covered in lava, where the Beast attacks with fire, and you can stay there. If you lure it toward the frozen archway at the back, it breaks it, and you follow it to a frozen room where it switches to icy versions of its attacks; if you then bait it into freezing the door blocked by fire, a third, larger arena opens, where it goes back to fire with much stronger attacks. Very agile and aggressive, it keeps leaping at you.
One set: no shrine or checkpoint between the arenas, and your set must hold against the Burn of the fire arenas and, if you go there, the Chill of the frozen room.
Spells, transformation and soaks are set at a Keeper's Shrine (soaks also with the Shen Monkey), never during a fight: what you bring into a fight stays until the end. One spell per category: Cloud Step and Rock Solid exclude each other, pick one before the fight.
What it inflicts
- Burn: in the fire arenas, its flames fill your Burn gauge faster than other yaoguai's: fire breath, fireballs and flaming charges; lava also covers part of the ground.
- Chill: in the frozen room, if you lure it there, it uses icy versions of its attacks, including a frost breath that freezes you.
Attacks to watch
- When it roars and slams its claws into the ground, a blast goes off around it, then a second one after a short delay: roll out of the area at once, or get away until it's over.
- Fire breath in a wide cone in front of it, in a straight line without tracking you: get behind it to strike, or get out of range.
- Charges: it crosses the room 3 times, leaving a trail of fire; dodge sideways on each pass. With the Fireproof Mantle, you can ignore the trails.
- Frontal grab: it throws you across the room or slams you into the ground several times. Don't stay in front of it: hit its flanks or hind legs, it has to turn to attack.
- Leaps in a row, like a frog, with a blast on every landing: keep your distance. From afar, it also leaps to throw 2 fireballs, and its big slams send a straight shockwave across the room: dodge sideways, even when far from it.
What works
- Fireproof Mantle: equipped, it raises your Burn Resistance and spares you the damage from the lava on the ground; activated, it makes you immune to Burn for a moment. Also keep Body-Cooling Powder on a quick slot, especially when its fire arcs scraped along the ground start piling up. Fireproof Mantle, Body-Cooling Powder
- In the frozen room, switch to Body-Warming Powder: it removes Chill and briefly raises your Chill Resistance. Body-Warming Powder
- Umbral Abyss: when the transformation ends, your health goes back to what it was before, and its spells help you strike and then retreat against its aggression. The Macaque Chief is also immune to Chill. Umbral Abyss
- Heavy attacks: they often stun it. When a big hit knocks it onto its back, Immobilize keeps it down longer; it also sometimes rolls over when it misses a punch, so counter then. Immobilize
Strategy
- The frozen room is easier: it hits slightly less hard there, with no fire or lava. Lure it early toward the frozen archway at the back of the first arena; while it chases you, Thrust Stance lets you hit it. Take off as much of its health as you can before the third arena, where its fire gets stronger. Thrust Stance
- Awaken Wine Worm: go through the frozen archway and up the stairs, it is on the left. If you don't grab it during the fight, come back afterward via the shrine: the arena has opened up. Awaken Wine Worm
- No rush: the cave remains accessible after the end of the story, and you can come back to fight it later, better equipped.
Access
Bishui Cave, Corridor of Fire and Ice shrine, the secret area's last, at the bottom of the second ice slide: go right, down the stairs and drop into the arena; a cutscene plays and the fight starts right away. To get there, enter the cave at the end of the Five Element Carts quest, then carry on past Top Takes Bottom, Bottom Takes Top. Optional, it is the secret area's final boss and one of the 5 bosses to beat to open Mount Mei.
What it gives
- to obtainThe Bull King's Iron Horn × 3
- to obtainCelestial Ribbon
- to obtainBishui Beast Bit
- to obtainFine Gold Thread
- to obtainMind Core
- to obtainDaoist's Basket of Fire and Water
Unlocks
- to obtainBull King's Mask
- to obtainBull King's Shan Wen Armor
- to obtainBull King's Bracers
- to obtainBull King's Greaves
- to obtainBishui Beast Staff
No source gives the Will it yields.
Its 3 Bull King's Iron Horns, plus the 4th from the chest on the left at the start of the bulls' hallway past the Cave Depths shrine, unlock the Bull King Armor Set: the Bracers and Greaves (1 horn each) resist Chill and Burn, the Mask and the Shan Wen Armor take 2. With 4 horns per playthrough, you craft 3 pieces at most in your first playthrough; the full set needs NG+.
The Bishui Beast Bit unlocks the Bishui Beast Staff, an upgrade of the Rat Sage Staff, for 4 more Gold Tree Cores, 8 Refined Iron Sand and 30,000 Will.
The Daoist's Basket of Fire and Water moderately raises the Attack of transformations that inflict Burn or Chill. Your win unlocks the "Frost and Flame" trophy and counts toward opening Mount Mei.
Updates
No published update changes this boss.
In NG+
In NG+, you keep your gear, spells, transformations and spirits, and bosses are tougher. Key items don't carry over: the chapter's quest items must be taken again.
Page checked on October 17, 2026.