
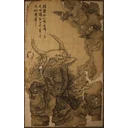
Cloudnest Peak
The Duskveil晦月魔君
- What it inflicts
- No status effect
- Phases
- 2 phases2 health bars; blood moon and bone sword in the second phase
- Equipment
- One setno shrine or checkpoint between the phases
Recommended gear
With what you can have when you first come across it.
Editor's pick No status to counter: the Jade Moon Rabbit and the Gold Sun Crow boost each other, and the Iron Pellet keeps its hits from interrupting your sips. Rock Solid rather than Cloud Step, since its stomps, headbutts and sweeps can be deflected; as an alternative, if you've beaten Yin Tiger, the Iron-Tough Gauntlets (1 Fine Gold Thread) boost your next hit after each deflection. The golden mask and shirt, along with the 2 Non-Pure pieces, chosen for their bonuses after your spirit, vessel or transformation, need 6 Fine Gold Thread, otherwise take the alternative pieces; as a second choice, the Spider Celestial Staff needs, on top of the Chitin Staff, 4 Gold Tree Cores and 8 Refined Iron Sand.
- Weapon attack
- 80
- Armor defense
- 188
- Resistance: Poison
- +8
Base values, before upgrades, from the registry.
- Weapon
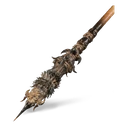 Chitin Staff Crafting: Venomous Hair × 1, Refined Iron Sand × 4, Yaoguai Core × 8, 20,000 Will
Otherwise: Spider Celestial Staff
- Headgear
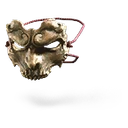 Golden Mask of Fury Crafting: Cold Iron Leaves × 4, Fine Gold Thread × 2, 6,600 Will
Otherwise: See No Evil
- Chest
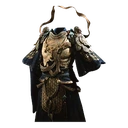 Golden Embroidered Shirt Crafting: Cold Iron Leaves × 5, Fine Gold Thread × 2, 8,000 Will
Otherwise: Loongscale Battlerobe
- Arms
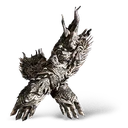 Non-Pure Gauntlets Crafting: Cold Iron Leaves × 1, Fine Gold Thread × 1, 3,600 Will
Otherwise: Iron-Tough Gauntlets, Loongscale Armguard
- Legs
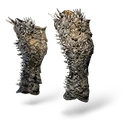 Non-Pure Greaves Crafting: Cold Iron Leaves × 2, Fine Gold Thread × 1, 7,200 Will
Otherwise: Loongscale Greaves
- Vessel
- Spirit
Otherwise: Tiger's Acolyte
- Transformation
Otherwise: Umbral Abyss
- Spells
- Curios
- Gourd
Otherwise: Stained Jade Gourd
- Soaks





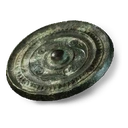
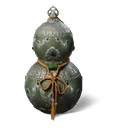
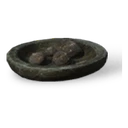
The fight
2 phases, 2 health bars, split by a cutscene; the first bar doesn't start full. 1: a giant rooster that stomps, leaps, charges and shoots feathers, without dealing much damage. 2: a blood moon fills the sky; stronger and more aggressive, it pulls a bone sword from its mouth, throws blades, spews blood mist and fires bigger projectile volleys. If you spared the Scorpionlord, he bursts in during the first phase to attack the Duskveil, then dies when the second phase starts.
One set: no shrine or reported checkpoint between the phases, and no status to counter; save your spells and sips for the second phase instead.
Spells, transformation and soaks are set at a Keeper's Shrine (soaks also with the Shen Monkey), never during a fight: what you bring into a fight stays until the end. One spell per category: Cloud Step and Rock Solid exclude each other, pick one before the fight.
What it inflicts
- None of the Four Banes: its strikes, feathers, blades and projectiles deal damage without a status, and you have no poison to deal with. Its blood mist, in the second phase, eats away at your health as long as you stay in it.
Attacks to watch
- First phase, a leap with flapping wings and kicks, a landing, then a roll: dodge at once if you're in range, otherwise wait for the roll. Variant: it spins in the air (a single dodge is enough), hangs there, then drops with a delayed stomp. Its stomps are what hurts most in the first phase.
- Back-and-forth charges, like a bull, several times in a row: dodge or deflect them. At the end, it collapses and gives you a big attack window.
- Projectiles fired from its wings: in the first phase, a horizontal row, to dodge through toward them or knock back with the staff spin. In the second phase, after a loud crow, it leaps back, then fires a concentrated volley and more volleys from the air: interrupt the crow with a charged attack or your spirit, otherwise run in a wide circle along the edge of the arena.
- Second phase, planted sword: it leaps, plants its sword in the ground, lands, then stomps on it, setting off a quake over a wide area. Get away as soon as the sword hits the ground, or switch to Pillar Stance as it lands.
- Second phase, blood mist spewed in front of it, out of which come a quick jab or the sword coughed through the mist: back off, and don't stay in the mist, which eats away at your health.
What works
- Second phase: A Pluck of Many right at the start, then Immobilize and the Wandering Wight's spirit attack; don't immobilize it while it's in the air. A Pluck of Many, Immobilize, Wandering Wight
- Rock Solid: its stomps, headbutts and arm sweeps can be deflected, and a deflection right before a leaping attack staggers it. Rock Solid
- Cloud Step, instead of Rock Solid, leaves a decoy for it to target during its aerial volley. Cloud Step
- Turn into Red Tides at the start of the second phase, then again around the middle of its second bar, once the transformation has recharged. Red Tides
Strategy
- Get through the first phase without spending mana or sips: the second is far more dangerous.
- In the first phase, stay underneath it and hit its legs with light attacks: most of its strikes target the area in front of it.
- Its attacks are slow and easy to read: land a few hits, then dodge when you see it winding up the next one. A gourd upgraded at the Shen Monkey helps you last in the second phase.
Access
Purple Cloud Mountain, final boss of the secret area that opens after your second win over the Venom Daoist. From the Petalfall Hamlet shrine, follow the path to the Cloudnest Peak shrine, then climb the statue-lined stairs to the large arena: it emerges from the fleshy mass covering the peak. Optional, but beating it grants the Weaver's Needle, very useful against the Hundred-Eyed Daoist Master, and is one of the requirements for reaching Mount Mei.
What it gives
- to obtainWeaver's Needle
- to obtainThe Duskveil's Horn
- to obtainKun Steel
- to obtainGold Tree Core × 2
- to obtainMind Core
- to obtainDouble-Combed Rooster Blood
Unlocks
- to obtainIron Horned Helm
After you win, Hong Yi stings the Duskveil with the Blood Stained Needle taken from Zhu Bajie and hands you the Weaver's Needle. Against the Hundred-Eyed Daoist Master, it pulls him out of his golden state and stuns him.
The Double-Combed Rooster Blood clears Poison when you drink while poisoned and moderately raises your movement speed and Critical Hit Chance. The Horn unlocks the Iron Horned Helm, once Yin Tiger is beaten.
The Kun Steel is one of the 2 needed to forge the Golden Loong Staff, recommended against it: on a first run, you will likely only get that staff after this fight.
Beating it counts toward "The Cockerel Crowed" trophy and toward reaching Mount Mei.
Updates
No published update changes this boss.
In NG+
In NG+, you keep your gear, spells, transformations and spirits, and bosses are tougher. Key items don't carry over: the chapter's quest items must be taken again.
Page checked on October 16, 2026.