
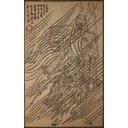
Fallen Furnace Crater
Yaksha King夜叉王
- What it inflicts
- No status effect
- Phases
- 2 phasesa single health bar; in the second part, he is more aggressive and extends his blades
- Equipment
- One setno shrine or checkpoint between the phases
Recommended gear
With what you can get before this boss, in your first cycle.
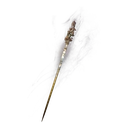
Editor's pick On your first attempt, you face him with the gear set up for Red Boy, since he follows with no shrine in between. After a death, you restart from the Fallen Furnace Crater shrine, directly against him: set up this loadout there, spells, transformation and soaks included. Keep the 4 Bronze pieces, since Immobilize works on him, but take the Weaver's Needle instead of the Fireproof Mantle, Ebon Flow, which deflects his blows and builds up Focus, instead of Azure Dust, and the Gold Spikeplate, which raises your Defense, instead of the Flame Orb.
- Weapon attack
- 80
- Armor defense
- 74
- Resistance: Burn
- +7
Base values, before upgrades, from the registry.
- Weapon
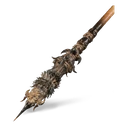 Chitin Staff Crafting: Venomous Hair × 1, Refined Iron Sand × 4, Yaoguai Core × 8, 20,000 Will
Otherwise: Bishui Beast Staff, Staff of Blazing Karma
- Headgear
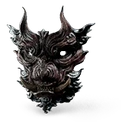 Bronze Monkey Mask Crafting: Yarn × 4, Silk × 2, 1,800 Will
Otherwise: Bull King's Mask
- Chest
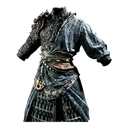 Bronze Brocade Battlerobe Crafting: Yarn × 5, Silk × 2, 2,000 Will
Otherwise: Bull King's Shan Wen Armor
- Arms
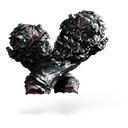 Bronze Armguard Crafting: Yarn × 1, Silk × 1, 810 Will
Otherwise: Bull King's Bracers
- Legs
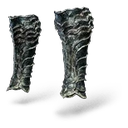 Bronze Buskins Crafting: Yarn × 2, Silk × 1, 1,080 Will
Otherwise: Bull King's Greaves
- Vessel
- Spirit
Otherwise: Father of Stones, Non-Able
- Transformation
Otherwise: Golden Lining, Azure Dust
- Spells
- Curios
- Gourd
Otherwise: Medicine Buddha Gourd
- Soaks




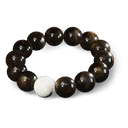
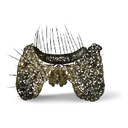
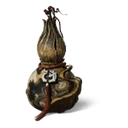
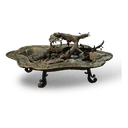
If you beat the Bishui Golden-Eyed Beast: the Bull King's Mask grants Focus when you take damage, the Shan Wen Armor offers high Defense, and 2 pieces of the set raise your Defense for a moment when you're hit. With 4 Iron Horns per playthrough, you craft 3 of them at most in your first playthrough, at the cost of the 4-piece Bronze bonus.
For the weapon, the Bishui Beast Staff or the Staff of Blazing Karma if you have their materials: together they need 8 Gold Tree Cores, so only one without a reserve from Chapter 4, and the Visionary Centipede Staff, if crafted during this chapter, takes 4 more; otherwise, keep the Chitin Staff.
The fight
A single fight against a fast warrior armed with blades that grow from his elbows: long attack strings, blades thrown at range and fields of spikes bursting from the ground. At first, Zhu Bajie fights alongside you, then pulls out. The lower his health, the further his attacks reach: he extends one or both blades for huge sweeps. At around 40% of his health, a rush followed by a grab triggers a costly cutscene.
One set: no shrine or checkpoint between his 2 parts.
Spells, transformation and soaks are set at a Keeper's Shrine (soaks also with the Shen Monkey), never during a fight: what you bring into a fight stays until the end. One spell per category: Cloud Step and Rock Solid exclude each other, pick one before the fight.
What it inflicts
- No status named: the detailed descriptions of his attacks, blades, projectiles and spike fields, mention none; a single source mentions fire damage.
Attacks to watch
- Spike field, his signature move: spikes come out of his back, then small blades poke out of the ground around him and shoot up; they often erupt a second time, sometimes wider. Run away, or dodge twice with the right timing.
- Wall run: he runs up a wall, leaps and comes down on you, making blades and rocks burst out over a very large area. As soon as he climbs the wall, get well away.
- Thrown blades: at range, he throws his blades repeatedly, often 4 or 5 in a row. Dodge sideways or sprint, or roll toward him to strike right after the last one.
- Extended blades: when only one blade glows, he chains very long arcs, often in threes, each announced by a word he calls out; his big sweeps go up to 6 swings. Learn the rhythm and roll under them, or hop onto your staff with Pillar Stance.
- Rush and grab, at around 40% of his health: dodge the rush, otherwise he grabs you and a cutscene of blows takes a big chunk of your health. Top up your health beforehand.
What works
- Heavy attacks: he is easily interrupted and staggered; a well-timed charged Heavy Attack cuts off most of his strings.
- Immobilize works on him: save it for the second part, when he darts around more, or open with Immobilize and A Pluck of Many and stay aggressive while your duplicates last, which can cost him nearly half his health. Save your transformation for his last quarter. Immobilize, A Pluck of Many
- Ebon Flow: its guard, with the sword held horizontally, deflects his blows and builds up Focus for heavy attacks that stagger him. Golden Lining works too. Ebon Flow, Golden Lining
- Pillar Stance: perched on your staff, you stay above his low sweeps. Against the string of his new forearm blades, hop on with 2 Focus Points, then strike with a heavy attack at 3; Cloud Step also baits his strikes. Pillar Stance, Cloud Step
Strategy
- At first, Zhu Bajie fights alongside you: use the distraction to strike, and hold off on healing, he can heal you.
- Before him, raise your Defense and Health (skill points, Mind Cores given to Xu Dog), then take your buff medicines before opening with your spells. Mind Core
- Leave him at around 5% health without finishing him for a few seconds: a special cutscene can then end the fight, especially if your own health is also very low.
Access
Field of Fire, Fallen Furnace Crater shrine: the fight starts right after your win over Red Boy, in front of the Bull King, with no shrine in between. Red Boy, who had faked his death, swallows the stone the Bull King kept in his belly and turns into the Yaksha King. Mandatory: he is the Chapter 5 final boss, and many guides present the 2 fights as one.
What it gives
- to obtainFine Gold Thread
- to obtainCelestial Ribbon
- to obtainGold Tree Core × 2
- to obtainKun Steel
- to obtainMind Core
- to obtainGrieved Body
- to obtainPlantain Fan
Will: 4,466
Unlocks
- to obtainYaksha Mask of Outrage
- to obtainEmbroidered Shirt of Outrage
- to obtainYaksha Bracers of Outrage
- to obtainYaksha Greaves of Outrage
Your win closes Chapter 5 and unlocks the "Flaming Fury" trophy: Zhu Bajie makes him spit out the relic, then Rakshasi hands you the Plantain Fan. This vessel speeds up your Stamina recovery and, when activated, lifts the enemy in a hurricane; it is in your inventory at the start of Chapter 6, so never against Red Boy or him in your first playthrough.
The Grieved Body, a relic granted automatically: pick 1 talent among Nimble Body (charged Heavy Attacks cost much less Stamina), Everlasting Vitality (considerably higher max Health) and Divine Safeguard (considerably higher Four Banes Resistance); a 2nd is added in NG+, a 3rd in NG++.
The Yaksha Armor Set can be crafted from the first Chapter 6 shrine: 12 Cold Iron Leaves, 6 Fine Gold Thread and 29,100 Will for the 4 pieces, which significantly increase both damage dealt and damage taken.
Updates
No published update changes this boss.
In NG+
In NG+, you keep your gear, spells, transformations and spirits, and bosses are tougher. Key items don't carry over: the chapter's quest items must be taken again.
Page checked on October 17, 2026.