
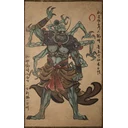
Pool of Shattered Jade
Venom Daoist黑手道人
- What it inflicts
- No status effect
- Phases
- 2 phases2 encounters: Pool of Shattered Jade, then Court of Illumination with 2 health bars
- Equipment
- Per-phase varianta shrine separates the phases
Recommended gear
With what you can have when you first come across it.
Editor's pick Here, his back is what matters: Immobilize, Cloud Step and the Wind Tamer help you reach it to break 4 arms, and the Stranded Loong's Whisker extends your next Immobilize after a sip; Umbral Abyss and the Apramana Bat spirit can also freeze him. Use a weak staff, like the Rat Sage Staff or the Wind Bear Staff, never stronger than the Kang-Jin Staff: the harder you hit, the more likely he dies before 4 arms give way. For the same reason, skip the Golden set, whose Attack bonus after a spirit or a vessel works against you: the Galeguard set, which takes no Fine Gold Thread, rewards Perfect Dodges instead, with extra Focus from 2 pieces for your charged heavy attacks and Mana with the greaves.
- Weapon attack
- 66
- Armor defense
- 95
- Resistance: Shock
- +4
Base values, before upgrades, from the registry.
- Weapon
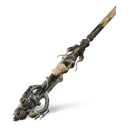 Rat Sage Staff Crafting: Samadhi Wind Agate × 1, Refined Iron Sand × 4, Yaoguai Core × 8, 21,000 Will
Otherwise: Wind Bear Staff, Kang-Jin Staff
- Headgear
Otherwise: Galeguard Beast Mask
- Chest
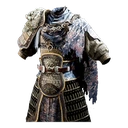 Galeguard Beastmaw Armor Crafting: Yarn × 5, Silk × 2, 2,000 Will
Otherwise: Loongscale Battlerobe
- Arms
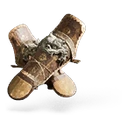 Galeguard Bracers Crafting: Yarn × 1, Silk × 1, 1,000 Will
Otherwise: Loongscale Armguard
- Legs
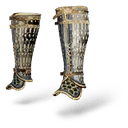 Galeguard Greaves Crafting: Yarn × 2, Silk × 1, 1,200 Will
Otherwise: Loongscale Greaves
- Vessel
- Spirit
Otherwise: Apramana Bat
- Transformation
Otherwise: Red Tides
- Spells
- Curios
- Gourd
Otherwise: Medicine Sage Gourd
- Soaks
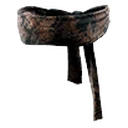
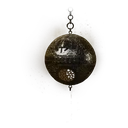




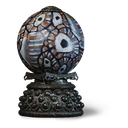
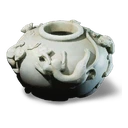
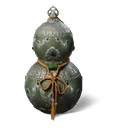
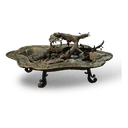
The fight
2 fights separated by most of the chapter. 1: you first hit the cocoon until the Daoist bursts out, wielding 2 swords, with 6 arms on his back, 4 of which can break. Once beaten, he flees. 2: he only has 2 extra arms left and 2 health bars back to back, with no shrine or refill in between; after a cutscene, the 2nd starts at full health, without extra arms, with longer, more aggressive combos.
One set per encounter: many shrines separate the 2 fights. In the 1st, the point is reaching his back to break his arms; in the 2nd, saving mana for the 2nd bar, which no shrine separates from the 1st.
Spells, transformation and soaks are set at a Keeper's Shrine (soaks also with the Shen Monkey), never during a fight: what you bring into a fight stays until the end. One spell per category: Cloud Step and Rock Solid exclude each other, pick one before the fight.
What it inflicts
- No known status: his attacks are sword and claw strikes, leaps, dashes and sword throws.
Attacks to watch
- Crouched, swords to the side: a leaping double slash, a roll into a ground stab, then a jump and slam. Dodge to the side and behind him, avoid the jump, then strike: he takes a while to get back up.
- One sword held high behind his back: a very fast dash, then a 2nd one. Dodge twice with good timing, or deflect the dash with Rock Solid if you took it instead of Cloud Step.
- At low health: a feet-first slide, a vanish, then a leap. Don't bother avoiding the slide, deflect the leap when he reappears.
- Encounter 2, 2nd bar: he floats, throws his 2 swords, leaps to grab them back and ends with a spinning slash; from a low guard, he walks forward in 6 very fast spinning slashes. Keep your distance or deflect.
- Encounter 2, 2nd bar: left sword in a reverse grip, a 3-hit dash, a flipping jump and slam, then a sweep as he lands: his hardest-hitting attack.
What works
- Cast Immobilize, then get behind him: that's where his arms break, and a well-placed charged heavy attack breaks at least 1. Area spirit attacks also reach his back. Immobilize
- Wind Tamer: together with Immobilize, it helps you subdue him, and so break his arms. Wind Tamer
- Rock Solid, in place of Cloud Step: deflecting his dash staggers him. Rock Solid
- Encounter 2: a fully upgraded A Pluck of Many, cast in an open space, then Immobilize; on the 2nd bar, rely mostly on your spirit and your transformation. A Pluck of Many
Strategy
- For the Armguard: only hit his back and use a weaker staff, so you don't kill him before the 4th arm. Charge 3 Focus Points, let him finish his combo, cast Immobilize, then hit his back with a charged heavy attack.
- After his leap into a ground stab, his weapon stays stuck for a moment: that's your window to strike.
- Encounter 2: save mana and gourd during the 1st bar, the 2nd follows with no refill. His aerial attacks leave a long opening.
- After the 2nd win, a chest in the nearby field holds a Soul Remigration Pill.
Access
2 encounters, optional. 1: Webbed Hollow, Pool of Shattered Jade shrine, off the main path (reached from the Upper Hollow shrine): take the path right of the shrine, through the hanging cocoons, to the big cocoon with a voice inside, and hit it. 2: Temple of Yellow Flowers, Court of Illumination shrine: turn back, pass the 2 Staff Daoists and climb the trail; at the fork at the top, slide down the left slope into the cave. He only appears there if you beat him at the Pool of Shattered Jade.
What it gives
- to obtainVenomous Armguard
- to obtainGold Tree Core
Will: 1,930
Unlocks
- to obtainPurple Cloud Mountain
Encounter 1: 1,930 Will, and nothing else except the Venomous Armguard, given only if you broke 4 of his back arms. It inflicts Poison Bane on the enemy when you land a critical hit.
Encounter 2: 1 Gold Tree Core, and the mural leading to Purple Cloud Mountain.
Updates
No published update changes this boss.
In NG+
In NG+, you keep your gear, spells, transformations and spirits, and bosses are tougher. Key items don't carry over: the chapter's quest items must be taken again.
Page checked on October 16, 2026.