
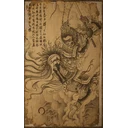
Heart of Birthstone
The Great Sage's Broken Shell大圣残躯
- What it inflicts
- No status effect
- Phases
- 2 phases2 health bars; on the second, he takes your relics and adds new moves
- Equipment
- One setno shrine or checkpoint between the phases
Recommended gear
With what you can get before this boss, in your first cycle.
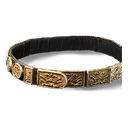
Editor's pick On your first attempt, you face him with the spells, transformation and soak set up for the Stone Monkey, since they only change at a shrine; Ring of Fire and the Plantain Fan work against him too. After a death, you restart from the Heart of Birthstone shrine directly against him: set up this loadout there, with Immobilize instead of Ring of Fire, Cloud Step instead of Rock Solid, Ebon Flow instead of Azure Dust and the Iron Pellet, which keeps a hit from interrupting your sip. The Amber Prayer Beads speed up your Focus and the Tiger Tendon Belt boosts your blows after a see-through.
- Weapon attack
- 135
- Armor defense
- 300
Base values, before upgrades, from the registry.
- Weapon
- Headgear
- Chest
- Arms
- Legs
- Vessel
Otherwise: Weaver's Needle
- Spirit
- Transformation
Otherwise: Azure Dust
- Spells
- Curios
- Gourd
Otherwise: Medicine Buddha Gourd
- Soaks
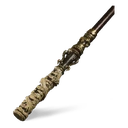
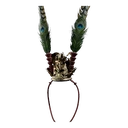
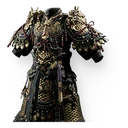
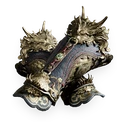
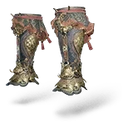

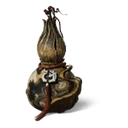
Ring of Fire kept from the Stone Monkey, or Spell Binder, remain good choices instead of Immobilize. The Weaver's Needle, instead of the Plantain Fan, deals damage at range without risk.
The fight
A mirror match: the Broken Shell fights like you, with your stances, your Perfect Dodges and your spells, Ring of Fire, Rock Solid and A Pluck of Many, but he chains attacks much faster and dodges a lot. When his first bar is empty, a cutscene: he takes your relics, whose bonuses you lose, along with your Great Sage form, and returns to full health. His second bar adds a rushing grab, Somersault Cloud charges, a rain of staves thrown from atop his staff, Immobilize and the theft of your gourd.
One set for his 2 bars: no shrine between them. The checkpoint is before him, after the Stone Monkey: after a first death, his set can differ from the Stone Monkey's.
Spells, transformation and soaks are set at a Keeper's Shrine (soaks also with the Shen Monkey), never during a fight: what you bring into a fight stays until the end. One spell per category: Cloud Step and Rock Solid exclude each other, pick one before the fight.
What it inflicts
- No confirmed status: his blows come from your own arsenal, staff and spells. Descriptions disagree on what his Ring of Fire does to you, but most say it empowers him: lure him out.
Attacks to watch
- Rock Solid: he turns to stone; if you strike, he counters, grabs you and his duplicates juggle you. If you hit him, he tries 2 grabs: stop attacking as soon as he hardens and back off.
- Perfect Dodges: he avoids your combos by leaving golden decoys that explode a moment later. As soon as he dodges, stop and back off; pressing on during his dodges often leads to a staff throw.
- Thrown staff: at mid range or farther, he throws his staff, which comes back like a boomerang; dodge sideways. Stay close to him rather than far.
- On his second bar, perched on his staff, he throws a series of staves, then swoops at you: run sideways or deflect them with Staff Spin, then dodge the finisher. On his Somersault Cloud, he charges and grabs you for an unblockable string: dodge as he arrives.
- Your gourd: on his second bar, especially when he is nearly beaten, seeing you drink makes him immobilize you, take your gourd and drink a sip. Drink far from him, during one of his long combos, or under the cover of Cloud Step; the Plantain Fan also buys you time.
What works
- Plantain Fan: throw it at the start and every time it recharges; it knocks him off balance and lets you strike safely, even with a 4-Focus-Point heavy attack. Plantain Fan
- Immobilize works, but the effect is short: use it to launch an offensive, cut off his Somersault Cloud or drink. With A Pluck of Many, it is a simple way to whittle down his health. Immobilize, A Pluck of Many
- Cloud Step: it breaks his Immobilize and repositions you, and lets you drink safely when he is nearly beaten. Cloud Step
- Focus first: his dodges cut off your light combos, so wait for your Focus Points before striking. In Smash Stance, the Varied Combo, a heavy attack in the middle of the light combo, sees through his attacks and hits him mid-swing; follow up with a Skyfall Strike. Smash Stance, Skyfall Strike
Strategy
- Save your spells for his second bar: the first has little health and his blows look like yours. Open the second with all your spells.
- On his first bar, your Great Sage form strikes very far with 4 Focus Points: charge the heavy attack from a distance, strike, back off and repeat. You lose it on the second bar.
- Push him against the invisible walls at the edge of the arena: with no room to dodge backward, he is easier to hit.
Access
Heart of Birthstone, same arena as the Stone Monkey: when it breaks apart, the Great Sage's Broken Shell appears and the fight goes on, with no shrine or break. Mandatory: it is the last fight of the story.
What it gives
No loot: his defeat closes the story and unlocks the "A Duel of Destiny" trophy. The relics leave his body and enter you; in the normal ending, the Old Monkey picks up the golden crown that fell into the water and places it on your head.
Finishing the game unlocks NG+ and the Challenge mode, where you can face him again, alone in Return of Rivals, or with the Stone Monkey in the Monkey Mind gauntlet, which rewards 3 Soul Remigration Pills and the Fragment of the Ocean-Settling Pillar.
In a New Cycle, his portrait is added to the journal; if you beat Erlang, the Sacred Divinity and the rest of the Mount Mei sequence before him, you receive the Free Mind relic.
Updates
Update 1.0.13: improved combat experience against The Great Sage's Broken Shell. Update 1.0.21: fixed water behaviour in the Heart of Birthstone area.
In NG+
In NG+, you keep your gear, spells, transformations and spirits, and bosses are tougher. Key items don't carry over: the chapter's quest items must be taken again.
Page checked on October 19, 2026.